
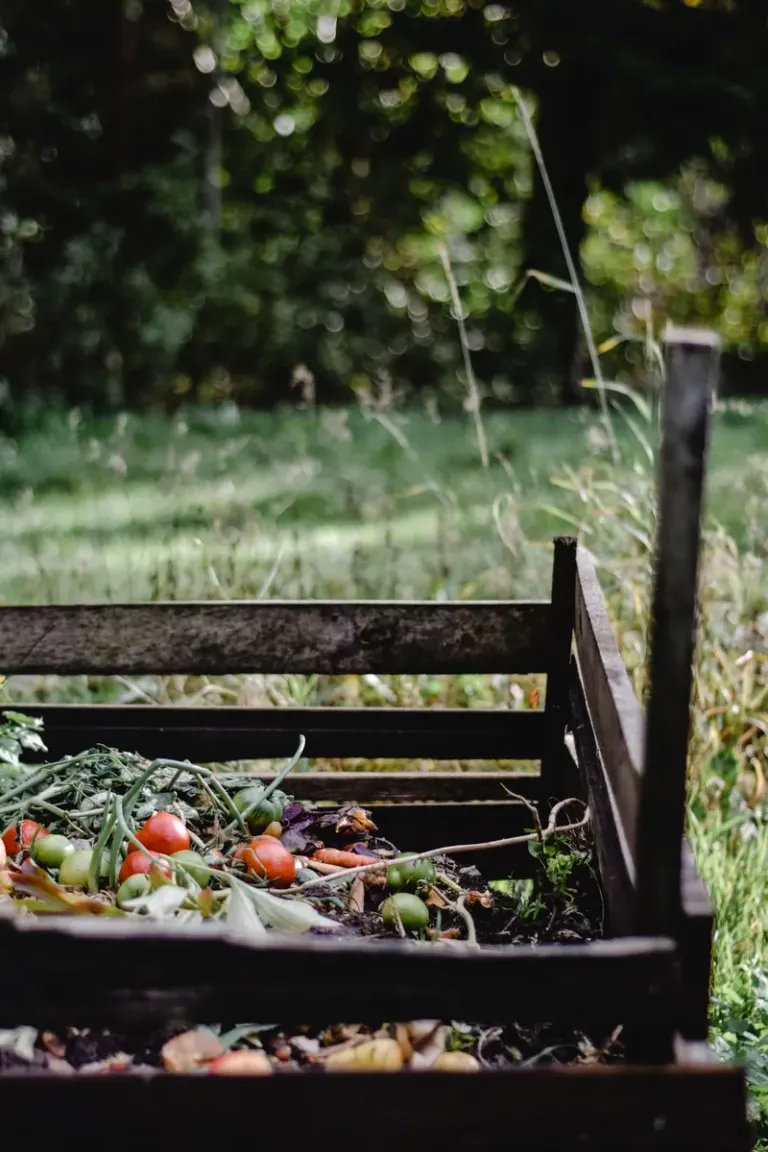
Ever thought your tiny home's trash and rinse water could be useful instead of a headache? When you live small, every inch and every gallon matters. This post turns that idea into a hands-on plan: how to set up composting and greywater systems that fit tight spaces, cut waste, and help your home run a little more self-sufficient.
Key takeaways
- Why Closed-Loop Systems Make Tiny Living Better
- Composting Options That Fit Small Spaces
- Greywater Systems for Tiny Homes: Practical Choices
- Staying Legal and Safe: Permits, Codes, and Best Practices
I moved into a micro cottage three years ago and learned most of this by trying things, failing spectacularly a few times, and then fixing them. I'll walk you through five things I care about: the benefits of closed-loop systems, composting options that fit small footprints, practical greywater setups, how to handle permits and codes, and how to size systems so they don't eat your time. You'll get space-saving tricks, the mistakes I made, and the trade-offs I wish someone had told me up front. If you want solutions you can install, maintain, and live with day after day, keep reading.
Why Closed-Loop Systems Make Tiny Living Better
Ever feel a little guilty sending a bag of food scraps and several liters of water out the door each week? I did. That nudged me to stop thinking of waste as a problem and start treating it like a resource. Closed-loop systems capture nutrients and greywater and put them back to work in pots, planters, or a small bed. For tiny-home living this isn't just doing your bit for the planet, it's practical: fewer trips to the dump, smaller utility bills, and less need to rely on outside services.
The wins go beyond "eco cred." Compost and recycled greywater make you more resilient during water restrictions, cut the trash you have to store or haul, and generally make day-to-day life smoother. When every liter and every box matters, saving a handful of trips to the dump or keeping a few liters of water on site makes a noticeable difference in clutter and stress.
Here are the main payoffs: lower waste output, free fertilizer for container gardens, less freshwater use, and simpler household routines. Yes, there are trade-offs - a bit of set-up time and some routine care - but knowing what you gain makes it easy to pick systems that fit your space and life.
Save money and space
In tiny living, saving cash and inches matters. Composting cuts trash pickups and gets rid of awkward countertop bins. A small worm bin or a 5 to 10 gallon tumbling composter will tuck into a closet or sit on a porch and handle most kitchen scraps. Greywater systems cut water use, so your bills drop and you may not need as much potable storage. In my first year I tightened habits and roughly halved my water use. That freed money and let me downsize my potable tank without feeling like I was constantly rationing.
Tip: start with a countertop scrap container and a tiny worm bin. If it struggles, move up one size. Small changes stack up.
Turn waste into resources
Compost turns into rich soil for herbs, balcony planters, or a little garden bed, replacing store-bought potting mix and fertilizer. That matters when every dollar of homegrown food counts. Greywater becomes irrigation. Showers and bathroom sinks are low-risk sources to reuse. A steady trickle of rinse water will keep ornamental shrubs, fruit trees, or a grow box alive during a heat spell.
Example: a steady trickle of shower water can keep three or four containers alive through a hot week. Use greywater on nonedible plants when possible, or pick low-risk edibles and follow local guidance.
Lower maintenance, fewer headaches
People assume these systems are high-maintenance. In my experience, compact setups actually reduce chores. A well-run worm bin gets a quick attention once a week. A mulch-filled greywater soak pit needs only occasional topping up. The trick is matching the design to your routine. I swapped my shower head, added a simple diverter, and watering basically became automatic. Less hauling of trash. Fewer smelly surprises.
Practical step: pick one "waste check" day a week. Empty compost, check moisture, and glance at greywater flow. Ten minutes keeps things out of crisis.
Resilience and better habits
Closed-loop systems build real self-reliance. During repairs, water restrictions, or travel, having compost and greywater options keeps a tiny home functioning. They also change habits. You start paying attention to what you buy, what you pour down the drain, and what you throw away. That quiet behavior change is the long-term payoff - it just makes daily life simpler, cheaper, and more satisfying.
Composting Options That Fit Small Spaces
Composting sounds messy until you try a method made for small homes. From worm bins that slide under a sink to tumblers on a balcony, there are systems that work in apartments, vans, and tiny yards. I began with a 10-liter countertop bokashi and moved up to a worm bin, learning which systems tolerate neglect and which need weekly care.
Food scraps pile up fast, and keeping them in a sealed, well-managed system stops odor, pests, and extra trash runs. Small-scale composting gives you nutrient-rich soil for potted herbs and micro-gardens - that’s a big quality-of-life win when outdoor space is limited. The right setup can be tidy and nearly odor-free.
Below I compare methods (vermicomposting, bokashi, small hot compost batches, and sealed tumblers), list space and material needs, and share the common mistakes I made so you can skip them. You’ll learn how to choose based on how much waste you produce, how often you want to tend the system, and whether it needs to live indoors or outdoors.
Composting systems that work in tiny homes focus on fit, routine, and a few tricks that keep small problems from turning into big headaches. Here are sensible choices, setup steps, and real-world fixes from my experience.
Choose the right system for your daily habit
Match the system to what you toss, where you can stash it, and how much time you want to spend. Mostly fruit and veg peels and want hands-off? Try a small batch drum or an indoor bokashi. Want more involvement and faster finished compost? A vermicompost bin is satisfying but needs weekly attention. Don’t try to force a hot compost pile in a studio; it needs volume and will frustrate you.
Setting up and basic care
Location matters. Keep indoor bins on a balcony, porch, or in a ventilated cabinet to control smell and humidity. Aim for a balance of browns and greens: shredded cardboard, paper, or dry leaves as browns, kitchen scraps as greens. Moisture should feel like a wrung-out sponge. Too wet, add dry bedding. Too dry, sprinkle water and mix. Stir or turn small bins once a week. For worm bins, add grit like crushed eggshells so worms can digest food. Block a ten-minute slot on your calendar for compost care. It keeps the system healthy and your life simple.
Troubleshooting common problems
Smell: healthy compost smells earthy. If it smells rotten, add browns, aerate, and cut back on wet inputs.
Fruit flies: freeze scraps for a day or bury them under bedding when adding.
Pests: use tight lids, keep bins off bare soil, and bury food in the center.
Slow breakdown: chop scraps smaller, keep moisture balanced, or add nitrogen-rich greens.
Freezing weather: bring vermicompost indoors or insulate outdoor bins with straw and a tarp.
I had fruit flies the first month until I started freezing peels for a day before tossing them in. Problem solved.
Harvesting and making it useful
Small systems produce finished compost in 2 to 6 months. Harvest by migration (move fresh food to one side and collect older compost from the other) or by sifting. Use finished compost sparingly in container mixes or as a top dressing. If you need volume fast, trade with a community garden or a neighbor. That saved me more than once.
Practical rule: keep it small and scale slowly. Start with a tiny system, learn the rhythm, then add capacity if you need it. You’ll save time and avoid stink, and you’ll actually use the compost you make.
Greywater Systems for Tiny Homes: Practical Choices
What if shower and sink water could help your plants instead of disappearing down the drain? That’s the point of greywater systems. For tiny homes the trick is to keep them simple, safe, and code-friendly. I tried a laundry-to-landscape setup and a kitchen-sink diversion. My first attempt clogged within a month. After a few tweaks it now runs reliably and waters container beds while needing maybe ten minutes of attention a week.
Greywater matters because it amplifies conservation. In a small household you can cut freshwater demand for irrigation, lower water bills, and reduce strain when supplies are tight. The challenge is knowing which greywater to reuse, how to route it without odors or health risks, and how to size a system to your living situation.
Below I cover practical systems: gravity-fed mulch basins, diverter valves, and compact treatment options that fit under a bench or inside a cabinet. I also explain which household sources to include or exclude, basic filtration ideas, and how to design something that needs little daily intervention while keeping plants healthy.
Greywater, done simply, turns rinse water into garden help. It reduces hauling, trims bills, and fits small footprints if you keep the design straightforward. I learned that the hard way; the small adjustments I made made it reliable.
Simple systems that actually work in tiny homes
Pick one based on your layout and water volume.
- Shower-to-mulch basin. Install a diverter behind the shower trap and route a hose to a shallow mulched basin planted with shrubs or tough ornamentals. Steps: fit a valve you can switch easily, add a hair trap, bury a short length of perforated pipe wrapped in landscaping fabric, and top with mulch. No storage, no smell. Works well for daily small volumes.
- Laundry-to-landscape. Many washers can be routed to a hose and run straight to a garden bed. Put an easy-to-access sediment bucket and simple screen inline. Direct-flow systems avoid storing greywater, which reduces health risk and odors. Use this for nonedible plantings or fruit trees away from living areas.
- Sink/shallow-drain diversion. Use a small container or gravity-run hose to feed a drip line to potted plants. Good for indoor-outdoor combos where you want to reuse quick rinse water without heavy plumbing changes.
Materials and common pitfalls
Useful parts: flexible hose, multiport diverter valve, hair and lint screen, 5-10 gallon sediment bucket, perforated pipe, geotextile fabric, coarse mulch. If you need pressure or to pump uphill, add a small pump and a screened pre-tank.
Watch out for these mistakes. Hard soaps, bleach, and high-salt detergents hurt soil and plants. Hair and lint will clog; pre-filters save time. Storing greywater more than 24 hours invites smells and microbes. Standing water attracts mosquitoes. In cold climates you must winterize or route drains indoors.
Maintenance and best practices
- Clean the screen or sediment bucket weekly at first, then adjust as you learn.
- Rotate irrigation points so one spot doesn’t get waterlogged.
- Use low-salt, biodegradable soaps and avoid bleach and fabric softeners for diverted loads.
- Label valves and pin a one-line cheat sheet nearby. You will thank yourself when guests come or you need to fix something.
- Watch the soil. If salts build up (white crust), flush with fresh water periodically and cut detergent strength.
Real-world tips
Start small. Divert one source and test it on potted ornamentals for a month. I left a clear hose on my first diverter so I could actually see hair and suds, and that saved me from a surprise clog. Keep access points reachable. Accept the trade-offs. Greywater is not invisible plumbing. It needs modest attention but rewards you with less waste, greener containers, and fewer fills on your potable tanks.
Staying Legal and Safe: Permits, Codes, and Best Practices
One surprise when I dove in was how different rules are from place to place. Some counties encourage small-scale recycling, others clamp down hard. This section helps you understand why legality matters, what to expect, and how to talk to officials so you do things right.
Safety and compliance aren't theoretical. Improper compost or greywater systems can attract pests, spread pathogens, or annoy neighbors. Knowing what counts as greywater versus blackwater, which treatment steps are required, and where systems are allowed saves you time and keeps your setup in place. It also helps you design systems that neighbors and inspectors accept.
Here are strategies that worked for me: check local plumbing and health codes, prepare a simple diagram for permitting, and make conservative design choices so you avoid red flags. Expect tips for documentation, what to ask local authorities, and how to find examples of approved small systems in your area.
Yes, the paperwork is boring. Do it once and sleep easier.
Know your jurisdiction
Start with one call. Contact your local building department and county health office and ask about greywater reuse, composting toilets, and on-site wastewater rules for accessory dwellings. Write down names and the date of the call. Rules are nuanced: some places allow simple above-ground greywater diversion without a permit, while others require a licensed plumber and inspections.
Tiny home status matters
How your tiny home is classified changes everything. Parked on private property and tied to sewer or septic usually falls under standard residential codes. On wheels or in an RV park may be governed by vehicle or park regulations. If your tiny is classed as an accessory dwelling unit you may see different setbacks and plumbing requirements. Keep a copy of your certificate of occupancy; it helped me smooth later permit conversations.
Composting and human waste
Kitchen composting is low risk in most places, but human waste is regulated. Composting toilets and urine-diverting systems can be permitted, but they often require documented treatment methods, maintenance plans, and sometimes soil tests. If you plan to sell or place your tiny home long-term, get written approval. Removing an unapproved system later is a costly headache I learned about the hard way.
Greywater and plumbing codes
Greywater rules focus on public health. Many jurisdictions allow immediate, on-site irrigation of nonedible plants from shower and sink water. Storing greywater over 24 hours usually brings stricter rules. Permanent plumbing changes often require a permit and licensed work to meet backflow and venting standards. I avoided a surprise by asking whether a diverter valve or a hard-plumbed lateral needed inspection.
Practical steps to stay compliant
- Research zoning, health, and building departments before buying components.
- Ask officials for written guidance or code citations. Save emails and take photos.
- If a permit is required, submit simple drawings that show routing, treatment, and plantings.
- Use a licensed tradesperson when codes require one. It reduces liability.
- Keep a maintenance log and label valves and tanks. That helps with inspections and resale.
Follow the rules and your systems will stay useful for the long haul.
Right-Sizing and Low-Maintenance Strategies
Too big is a burden and too small fails when you need it most. Right-sizing means matching compost volume and greywater handling to your habits, seasons, and maintenance preference. From personal experience, small redundancies and tiny automations keep systems running instead of abandoned.
Maintenance time and reliable performance are what make systems sustainable. Below I show how to estimate your daily waste and greywater, give sizing guidelines for typical tiny households, and share small design tweaks that cut chores. Low-flow fixtures, pre-filters, and batch composting techniques make life easier without sacrificing function.
You’ll also get scheduling advice: how often to turn compost, when to divert greywater, and how to grow capacity if your household changes. The goal is a setup that fits your life, not one that reshapes it around chores.
Maintenance sizing: match capacity to how often you want to work on it
Sizing is about how often you want to open a lid, unclog a screen, or empty a tank. I undersized things early because I wanted to save space, and that meant babysitting systems. Once I sized for a realistic maintenance cadence, life got easier.
How to size for minimal fuss (step by step)
- Measure a week. Use a known container (a 2-5 liter bucket or a reused grocery bag) and record how much food scrap and greywater you produce for seven days. Don’t guess. Real numbers change everything.
- Pick your cadence. Decide whether you want to check systems daily, weekly, or monthly. Tiny-home life made me pick weekly. If you travel a lot, add a buffer.
- Multiply and add margin. Multiply your daily average by the number of days between maintenance, then add 20-50 percent for safety (guests, heavy cooking, laundry day). That gives you the working volume your system must handle.
- Convert to system size. For compost bins, use liters (match your measured scrap volume). For greywater, plan distribution so you avoid storing water more than 24 hours if possible.
Practical sizing rules of thumb
- Compost (kitchen scraps): for weekly attention, aim for a bin about 2-3 times your weekly scrap volume to allow space for browns and airflow. For most one-person tiny homes that’s a 20-40 liter active bin. If you want monthly attention, double that.
- Vermicompost: surface area matters more than depth. Give roughly 0.1-0.2 square meters (about 1-2 square feet) of tray area per 0.5-1 kg of food scraps per week. If you feed more, add another tray rather than building deeper. That makes harvesting easier.
- Greywater (no storage): design distribution to accept your daily flow. If you shower and run the sink and laundry, measure liters per day and split the flow among planted basins or containers. Distributing to several pots is better than a tiny holding tank.
- Greywater (short-term holding): avoid storing more than 24 hours. If you must store for trips, size a tank to your trip length plus a safety margin and plan to pump or use the water quickly on return.
Low-maintenance design tips
- Make cleanouts reachable. Hinges, threaded caps, and slide-out sediment buckets save time.
- Modular beats custom. Stackable trays and add-on lines let you grow capacity instead of rebuilding.
- Visual cues help. Clear sight tubes or removable lids show fill level so you don’t discover problems too late.
Sizing for the life you want, not the smallest box you can fit, is the single best trick I learned. It kept systems reliable and made maintenance a short, predictable task instead of a weekend emergency.
Living small makes every decision matter. The main takeaways: closed-loop systems turn kitchen scraps and rinse water into real resources. Composting options like a tiny worm bin, a bokashi bucket, or a 20-40 liter tumbling bin fit closets and porches. Greywater setups (shower-to-mulch basin, laundry-to-landscape, or a simple sink diversion) cut freshwater use while keeping maintenance low. Right-sizing and a weekly check are what keep these systems working. And yes, legality and permits matter. Check codes early so you don't have to undo a working system later.
Start small. If you mostly make fruit and veg scraps, try a countertop container and a tiny worm bin first. If you shower daily and have a few pots or a small garden bed, add a diverter and route shower water to a mulched basin with a hair trap and a short perforated pipe. Keep parts simple: a multiport diverter valve, a 5-10 gallon sediment bucket for lint, and geotextile fabric under the mulch. Make cleanouts reachable, label valves, and keep a one-line cheat sheet near any plumbing changes.
Do the measuring step before buying anything. Track one week of food scraps and greywater flow with a 2-5 liter container. Pick your maintenance cadence (weekly worked for me), multiply by the days between checks, then add 20-50 percent margin. That gives you the working volume to size a compost bin or plan greywater distribution. For vermicompost, aim for 0.1-0.2 square meters of tray area per 0.5-1 kg of weekly scraps. Those small calculations save hours of headache later.
I’ll be honest: you will mess up at least once. My first diverter clogged and an unpermitted toilet almost cost me a fine. Learn from that. Call your building or health department, save emails, get written guidance if needed, and choose conservative designs inspectors recognize. Use low-salt, biodegradable soaps, rotate irrigation points, and winterize if required. Modular systems that grow with you, plus a sight tube or clear hose to spot clogs early, kept my systems usable instead of abandoned.
Take action this week. Measure your scraps for seven days, set up a countertop container, or fit a simple shower diverter and test it on a few potted plants. Start small, log what you learn, and tweak your sizing before scaling up. If you want help picking a system for your layout, leave a comment or subscribe and I’ll send the step-by-step checklist I use for tiny homes. Small steps add up fast, and once your compost and greywater are running, you’ll save space, money, and a surprising amount of daily friction.
Related product reviews
Best Over-Door Vertical Planter Shelves for Minimalist Space
Add greenery without losing floor space - discover over-door vertical planter shelves for minimalist space. Space-saving, foldable, self-watering options.
Read more
Best Over-the-Sink Cutting Board Systems for Small Apartments
Reclaim sink space with top over-the-sink cutting board systems that streamline prep, draining, drying, and storage in a small apartment kitchen.
Read more
Best Slim Under-Sink Sliding Drawers for Micro-Apartment Bathrooms
Compare slim under-sink sliding drawers that reclaim vertical space in micro-apartment bathrooms. Find narrow pull-outs that organize toiletries.
Read more