
Layered Daylight Lighting to Make Windowless Rooms Feel Natural
Last updated By Maya Bennett
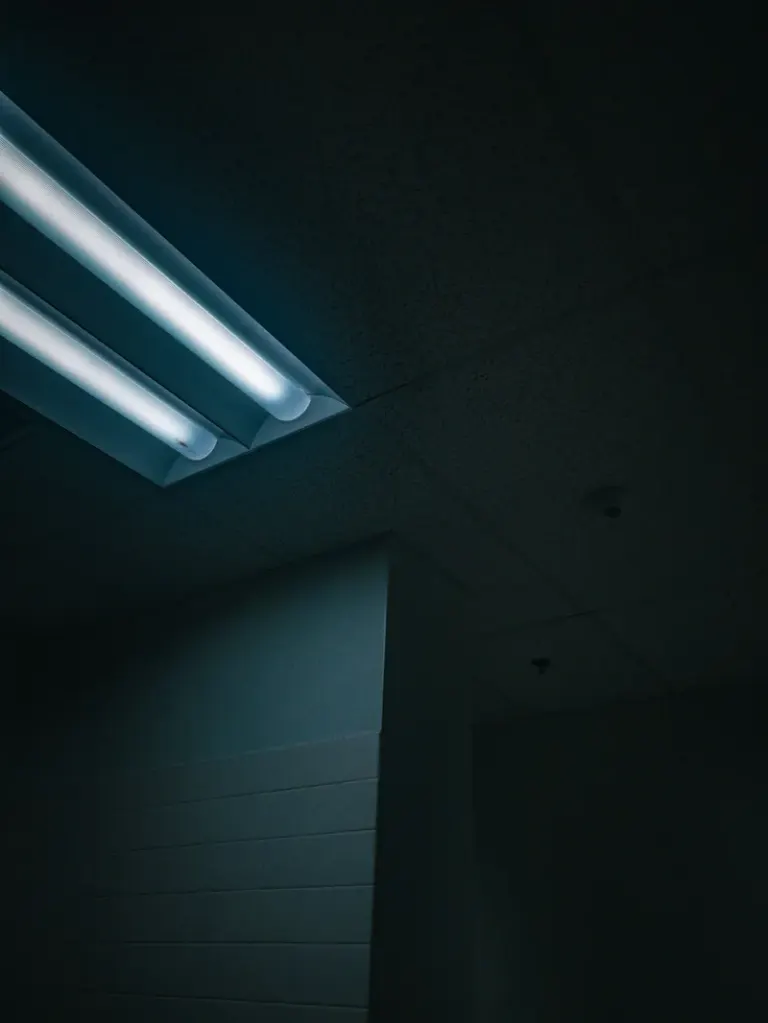
Unlock realistic daylight in windowless rooms with a layered lighting plan: ambient, task, and circadian strategies, plus fixture picks and placement tips.
Key takeaways
- Why Daylight Transforms Small Windowless Rooms
- Building Light in Layers: Ambient, Task, Accent
- Plan Like a Designer: Layout Tips for Maximum Light
- Choose and Place Fixtures to Mimic Real Daylight
If you live in a tiny home, studio, or van, you know how a lack of windows can make a room feel smaller, colder, and a little disorienting. Daylight does more than just brighten a space. It models surfaces, reveals true color, and creates depth that helps compact rooms breathe. Without a window you can recreate those visual cues with thoughtful lighting so the room reads as larger, calmer, and genuinely usable.
I want to show you how to get realistic artificial daylight with a layered plan that balances ambient glow, task-focused beams, and circadian-friendly controls. We’ll cover five things: why daylight matters, the core layering pieces, planning and layout tips for tight spaces, fixture selection and placement, and simple control strategies to sync your light with your day. My approach is small-space-first: visual flow, multipurpose fixtures, and placement tricks that add depth without adding clutter.
Expect practical moves you can try right away. Later on I’ll give metrics, fixture types that work well in tight quarters, and low-wiring control setups that help you sleep, focus, and wake up feeling natural. If you want a windowless room that finally feels like daylight was invited in, keep reading.
Why Daylight Transforms Small Windowless Rooms
Darkness in a tiny space quickly feels oppressive. Real daylight hands your brain clues about distance, texture, and time of day. Recreating those cues is not a nicety. It’s a design move that alters how a room reads, how you feel in it, and how well it functions.
Daylight matters for two reasons: physiology and optics. On the physiology side, the right color temperatures and light levels help regulate circadian rhythm, which influences sleep, energy, and focus. On the optics side, daylight has broad spectral content and contrast that makes colors sing and planes separate. In a small room those effects give visual depth so a corner becomes a corner instead of one big shadow.
When you understand the cues you want to recreate (soft indirect glow for depth, brighter directional light for work, cooler light for alertness), every fixture and placement choice gets easier. Pick the right tools and you’ll get daylight-like effects without wasting space. The sections below show exactly how to translate those cues into a compact, layered lighting plan.
Daylight cues are the primary tool for shaping perception in tight rooms. The right approach makes materials read correctly, supports energy and focus, and signals evening wind-down so your body knows when to relax.
Visual flow and perceived space
Think of light as a way to organize surfaces. Natural light creates a hierarchy of planes. You can fake that with layered artificial sources to add depth and guide the eye, which makes a small room feel larger. Aim for a ceiling that’s a touch brighter than the walls and wall washes that create subtle gradients from top to bottom. Uplights or wall washers behind a sofa or along a long wall will visually push that surface away from you. Little accents, like a slim vertical wash in a corner, create the shadow-and-highlight play that suggests volume.
Rhythm, mood, and performance
Light tells your body how to behave. Use cooler, higher-intensity light in the morning, roughly 5000 to 6500 K, to wake up and focus. Shift to warmer, dimmer light in the evening, around 2700 to 3000 K, to encourage winding down. If you don’t have tunable white fixtures, mix sources: a cool task lamp for focus and a low-level warm uplight for evenings. Gradual ramps feel right; abrupt jumps feel theatrical.
Color fidelity and tasks
If you prep food, style outfits, or do detailed work in a small home, accurate color matters. Aim for lamps with a CRI of 90 or above in kitchens, vanities, and work areas. For tasks like cooking or reading target about 300 to 500 lux at the work surface. Ambient living zones can sit lower, around 100 to 300 lux. Good color rendering and the right intensity cut eye strain and make materials read the way they should.
Quick, actionable moves for tighter footprints
- Wash one long wall with indirect light to widen the room visually.
- Put a cool, directional task light over your main workstation or vanity.
- Tuck a warm, dimmable uplight behind furniture to create evening depth without glare.
- Use a light-colored ceiling and a few reflective surfaces to bounce light and get more usable brightness from fewer fixtures.
These small moves give the biggest return in a cramped space. Next we’ll turn these ideas into a step-by-step layered lighting layout for tiny rooms.
Building Light in Layers: Ambient, Task, Accent
Layered lighting is how you get believable artificial daylight. It means combining ambient light for overall illumination, task light for focused activities, and accent light to sculpt form and depth. In small spaces each layer often needs to pull double duty, so pick fixtures that are efficient, discreet, and multi-functional.
Ambient light sets the base so shadows are soft and the room feels unified. Task light gives concentrated brightness where you read, cook, or work. Accent light chisels planes and textures so the eye has reference points that mimic daylight’s directionality. When those layers balance, a windowless room will feel dimensional instead of flat.
In cramped footprints you’ll rely on fixtures that do more than one thing and on reflective finishes to stretch each layer further. Think indirect uplighting paired with under-cabinet strips, or a pendant that also throws light up. Below I’ll break down how to choose and combine these layers, what intensity ratios to aim for, and simple layouts that open a tiny room without crowding it.
Core layered components
Treat each layer like a brushstroke. Ambient is the base coat that gives even, forgiving illumination. Task is the detail brush for reading, cooking, and working. Accent sculpts and separates surfaces. The fill or bounce layer softens shadows and lifts the ceiling visually. Controls are the director that ties the whole scene together and makes it change smoothly. Think of these as modular tools you mix depending on how the room is used.
Practical fixture picks for small spaces
- Ambient, low-profile options: slim LED panels, shallow flush mounts, or a hidden continuous strip in a narrow cove.
- Task, directional sources: a clamp lamp that swings over a workbench, a slim under-cabinet strip, or an articulating wall sconce by the bed.
- Accent, sculpting lights: small directional spots or a narrow-beam wall washer to brighten a vertical plane.
- Fill, soft lifts: a tiny uplight behind furniture or a floor lamp with an upward-facing diffuser to lift the ceiling without hogging floor area.
If wiring is impossible, go plug-in or battery-powered. Pick fixtures with good shielding or frosted lenses so you avoid glare. A raw LED dot in your face ruins the illusion.
Placement and layering strategy
Start with the ambient source centered or hidden along the longest plane so light spreads without hard shadows. Put task lights above or slightly behind the user to keep glare off screens and work surfaces. Place accents to create a light-dark hierarchy: a wash on a long wall, a focused spot on a shelf, and a small uplight behind a sofa or cabinet. Keep accents out of main sightlines so they guide the eye, they don’t compete with it.
Think vertically. A narrow vertical wash reads like a window and adds depth instantly. In small rooms several low-output sources usually beat one overpowering fixture.
Controls and integration
Use dimmers, layered switching, or smart plugs so you can combine layers quickly. I recommend three or four presets: a bright focused scene, a relaxed evening scene, and an all-on cleaning scene. Smooth transitions make the lighting feel natural and stop the room from looking staged.
A thoughtful mix of these components gets you believable artificial daylight while keeping floor space and clutter to a minimum.
Plan Like a Designer: Layout Tips for Maximum Light
Good lighting starts with a plan. Map how you use the room throughout the day and mark sightlines, focal points, and clutter zones before you buy fixtures. In a small space even minor furniture swaps or a different paint choice change how light behaves, so planning is both creative and practical.
Zone the room: sleeping, cooking, working, relaxing. Prioritize task lighting where needed while keeping ambient sources high enough to avoid harsh contrast. Use reflective finishes, pale paint, and vertical layering to bounce light into corners and raise perceived ceiling height. Mirrors and glossy cabinetry can make a modest fixture feel much bigger.
Below I’ll walk you through sketching a lighting plan, estimating needed illuminance for tasks, and placing furniture to improve visual flow. These planning steps turn a haphazard glow into a cohesive, daylight-like environment.
Assess the room and map activity zones
Start with a quick sketch. Note ceiling height, main furniture, and the primary tasks in each area. Mark sightlines from the door and from the main seating so you know where the eye lands first. In a studio the long wall opposite the entrance is prime real estate for a vertical wash that reads like a window. In a van, the head of the bed and the galley are your biggest priorities.
Think about how the space is used through the day. Put brighter, cool-capable sources near work zones and keep warm, dimmable sources near rest areas. This is planning with purpose, not random fixture placement.
Lay out lighting like furniture
Treat lights like pieces of furniture that define zones. Start by placing one or two anchor fixtures that provide broad, even coverage. Add task sources where you read, cook, or work on a laptop. Finish with small accent units to separate planes and add depth.
A practical sequence: anchor ambient along the longest plane, position task lights within arm’s reach of work surfaces, and tuck uplights or narrow wall washes behind low furniture to lift the ceiling. For example, a shallow cove or hidden LED strip above the sofa makes an excellent ambient backbone, while a swing-arm lamp and a slim under-shelf strip handle tasks.
Practical placement rules and quick measurements
- Avoid direct glare. Put bright sources above eye level or behind diffusers. Aim spots at about 30 degrees from the surface to get a clean wash without harsh highlights.
- Use distance to control intensity. Multiple low-output sources usually feel better than one overpowering lamp. Spread light in layers so shadows stay soft.
- Create faux windows. A vertical wash on a long wall, starting just below the ceiling, reads like incoming daylight and pulls the wall visually away. Place a mirror opposite to amplify the effect.
- Backlight furniture. Set small uplights about 8 to 12 inches behind a low cabinet or sofa to create a halo that visually raises the ceiling.
- Respect clearances. Keep pendants at least 30 inches above tabletops and high enough over circulation paths so they don’t get in the way.
Tiny detail that works: hide a warm LED strip behind the top shelf of a bookcase. That little glow feels exactly like a morning sunbeam and barely costs any space.
Plan in layers, place lights to guide the eye, and let furniture and finishes carry the light.
Choose and Place Fixtures to Mimic Real Daylight
Picking fixtures for a tiny room is a balance of scale, performance, and looks. Color temperature, CRI, beam angle, and mount type all affect how daylight-like a lamp will read. Choose fixtures that save headroom, tuck into cabinetry, or double as storage whenever possible.
Good picks for windowless rooms include low-profile recessed cans with baffles, linear LED battens for indirect uplighting, under-cabinet strips for tasks, wall washers for vertical planes, and small directional spots for accents. Watch beam spread and placement so you don't end up with glare in beds or work surfaces. Indirect uplighting and wall grazing are especially good at creating soft, enveloping daylight without harsh shadows.
Choosing fixtures for tight ceilings and tight budgets
I favor low-profile, multi-task fixtures. Flush or semi-flush LED panels and shallow puck lights give broad ambient light without stealing headroom. For directional needs pick mini-tracks, gimbal downlights, or slim-profile wall washers so you can sculpt planes without bulky hardware. Look for fixtures with baffles or frosted lenses to cut pinpoint glare that looks enormous in a small room. If you can’t hardwire, quality plug-in pendants and clamp-mounted task lamps let you experiment before committing.
Placement rules of thumb that actually work
Aim for even coverage with several modest sources rather than one dominant lamp. For recessed or surface downlights, space them at about 1.5 times the ceiling height to avoid pools and dark bands. For wall washers, space fixtures at roughly 1 to 1.5 times their distance from the wall to get a continuous vertical wash. Tilt adjustable spots 20 to 30 degrees off vertical to model texture without blasting viewers with glare. Keep accent beams narrow, about 15 to 30 degrees, for art and shelves; use wider beams, 60 to 120 degrees, for general wall washing.
Room-specific placement examples
- Studio living wall. Run a linear washer along the long wall so the light grazes texture and pulls the wall outward. Space small washers evenly and keep the top of the wash a handspan below the ceiling to suggest incoming light.
- Micro-kitchen. Mount under-cabinet strips 2 to 4 inches back from the cabinet front to light counters and avoid seeing the LED directly. Put the strip on its own circuit or plug-in so it can be isolated from ambient scenes.
- Sleep nook. Pair a low-output uplight hidden behind the headboard with an adjustable reading lamp. Keep the uplight low and concealed so it lifts the ceiling subtly without waking you.
Practical installation and rental-friendly hacks
Always test placement before you drill. Clamp fixtures temporarily or use removable double-sided tape to trial LED strips. For tape LEDs, keep runs under about 16 feet on a single driver or use higher-voltage segments to prevent dimming at the far end. Hide wiring in narrow, paintable raceways. Use smart plugs or inline dimmers if rewiring is off the table. Photograph your tests-the camera will show hotspots and shadow issues your eye glosses over and save you from expensive fixes.
With careful selection and measured placement, each fixture can pull double duty, giving you believable daylight cues while keeping the footprint small.
Control Light, Control Rhythm: Circadian and Smart Strategies
Lights that mimic daylight work best when they change through the day. Controls let you shift intensity and color temperature to match morning, midday, and evening needs. In small homes a few well-configured controls usually beat a dozen scattered switches because they simplify scenes and reduce clutter.
Tunable white fixtures let you move from cooler, blue-enriched light for alertness to warmer tones for winding down. Simple timers, programmable switches, or smart bulbs can automate those shifts so your room supports your sleep-wake cycle. Motion sensors and adaptive dimming save energy in places where people move quickly between zones.
In tight quarters pick control strategies that minimize visible hardware: wireless scene buttons, a single-zone hub, or routines tied to sunrise and sunset. Below are recommended schedules and basic setups that don’t require complicated wiring, plus tips for mixing manual overrides with automation so the lighting always feels natural.
How controls shape perceived daylight and daily rhythm
Controls are the choreography behind convincing artificial daylight. In a small space they do more than change brightness. They let one set of fixtures act like morning sun, focused studio light, or bedside glow. Think of controls as the user interface for your layered plan. Good control choices amplify each layer and keep interaction simple.
Practical control options for small spaces
- Wall-mounted scene buttons or compact remotes. One press switches whole zones so you don’t fiddle with multiple lamps.
- Smart bulbs and inline dimmers. Great when you can’t rewire. They allow color tuning and scheduled scenes through an app.
- Motion and ambient light sensors. Use these for corridors, bathrooms, and galley areas where hands are full. Set short delays so lights turn off when unused.
- Battery scene controllers and plug-in timers. Perfect for rentals and mobile homes. Mount with removable adhesive for a tidy look.
- Local override. Always keep a simple physical switch or lamp control next to the bed or work area. Automation is handy, but you want manual control fast.
A simple circadian schedule you can build today
- Group your lights by function: ambient, task, accent. Name those groups in your app or controller.
- Create four scenes: Wake, Work, Wind-down, Night. Have Wake start dim and bloom up over 30 to 45 minutes. Work is higher output with a cooler bias. Wind-down slowly lowers intensity and shifts warmer over 45 to 90 minutes. Night is a very low, warm or red-forward glow for safe navigation.
- Add timing and triggers. Link Wake to your weekday alarm or a sunrise offset. Tie Night to bathroom motion sensors for hands-free trips.
- Test the schedule for a week. Tweak durations and intensities until the transitions feel natural.
Rentals and low-wiring hacks
No hardwiring? No problem. Use smart bulbs in key fixtures, run tape LED strips on a plug-in driver and hide the driver inside furniture, and control scenes with a portable remote or app. For camper vans, use the vehicle’s 12V system and a small programmable controller or dimmer to mimic the same scenes on battery power. If you’re unsure about wiring, get a pro to help.
Integration tips and real-world tweaks
- Avoid high-intensity cool light within an hour of bedtime. Switch to low, warm or amber tones for night tasks.
- Layer control inputs. Combine motion sensors for convenience with a scene button for deliberate changes.
- Keep presets lean. Three or four well-tuned scenes beat a dozen half-used ones.
- Photograph and live-test each scene. The camera reveals hotspots and shadow patterns our eyes forgive.
Controls provide the rhythm. With a few well-chosen tools you can make a windowless room behave like a comfortable, daylit space without clutter.
Wrapping Up
You now have a practical roadmap to invite believable daylight into a windowless room. The essentials are straightforward. Daylight cues matter for both how you feel and how your space reads. Build a layered plan of ambient, task, and accent light so the room has visual flow. Use uplighting, wall washes, under-cabinet strips, and small directional spots to sculpt planes. Prioritize good color rendering (CRI 90+), appropriate intensities (about 300 to 500 lux at task surfaces, 100 to 300 lux for general living), and tunable white or mixed temperatures (roughly 5000 to 6500 K for morning alertness, 2700 to 3000 K for evening wind-down).
My practical recipe: start with one anchor ambient source along the longest plane to create a soft ceiling and wall wash. Layer in a cool, directional task light at your workstation or kitchenette, and tuck a warm, dimmable uplight behind furniture to lift the ceiling at night. Use low-profile, multipurpose fixtures and reflective finishes to get the most out of each watt. You won’t perfectly replace a real window, but you can recreate the cues that matter: vertical gradients, shadow modeling, and circadian rhythm. I once hid a tiny strip behind a bookshelf and had guests swear there was a windowed nook. Small experiments work.
If you want to act now: sketch your zones and sightlines, place one ambient anchor, add one task source per key activity, and choose one subtle accent to separate planes. Test placements temporarily with clamps or removable tape and photograph the scenes to spot hotspots. Add a simple control: a smart plug, a scene button, or a programmable timer. Build four scenes named Wake, Work, Wind-down, and Night, and tune them over a week.
Pick one small change this week: a vertical wall wash, a hidden uplight behind a sofa, or a plug-in under-cabinet strip. Install it temporarily, live with it for a few days, and see how the room reads. If it shifts how the space feels and how you sleep or focus, expand the plan. Drop your room dimensions or before-and-after photos in the comments and I’ll help sketch a compact, daylight-informed layout. Light is the cheapest, most transformative upgrade for a small space. Start small, test, and let it change how your home breathes.
Related product reviews
Best Slim Recessed Medicine Cabinets for Tight Bathrooms
Find slim recessed medicine cabinets that tuck storage into walls, boost mirror light, and add adjustable shelves for tight bathrooms, vans, and studios.
Read more
Best Mirrored Sliding Doors with Integrated Art for Small Spaces
Discover space-saving mirrored sliding doors with integrated art that open your small space, hide clutter, add style, and unlock multifunctional rooms.
Read more
Best Corner-Mounted Mini Projectors for Small Spaces
Discover corner-mounted mini projectors that free floor space, deliver big-screen viewing, and offer portable, mountable picks to maximize your small space.
Read more