
Site Your Tiny Home Legally: Permits, Zoning & Small Space Placement
Last updated By Maya Bennett
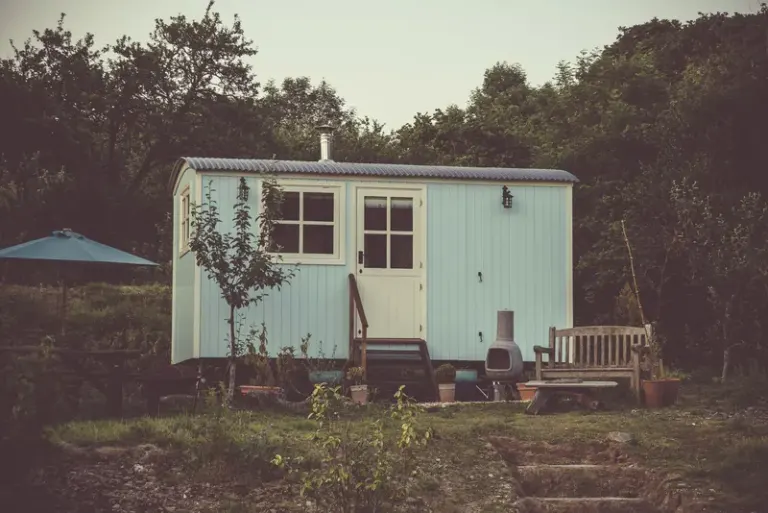
Here is what most people miss when they dream about living tiny: the rules matter as much as the design. I learned that the hard way when I signed the lease on my first micro backyard spot. I thought clever storage and a folding table would solve everything. Instead, what almost sank the plan was a zoning map and a very polite county planner. That surprise turned into one of the best lessons of my compact-living journey. Regulations are not the enemy. They can point you to where tiny living will actually work, and they’ll keep you out of fines, forced moves, and costly retrofits.
Key takeaways
- How Zoning Really Shapes Your Tiny Home Options
- Permits and Approvals: What You Really Need to Move Legally
- Picking a Site and Hooking Up Utilities Without Losing Your Mind
- Passing Inspections and Staying Compliant Long Term
I wrote this to be the guide I wish someone had handed me before I parked my tiny home. I’ll walk you through reading the zoning landscape, navigating permits and approvals, picking a realistic site with usable utilities, preparing for inspections, and what to do if you need an appeal. I mix plain-language rules with what I actually experienced, plus small, practical workarounds that make everyday life easier. I’ll flag the common money-and-time traps and share fixes that really work.
This isn’t a legal brief or a sales pitch. It’s advice from someone who moved from anxious planning to a calm, stable tiny life. If you want to avoid fines and surprises and actually make a compact home work long term, read on. There’s a path to legal, peaceful tiny-home living, and I’ll walk you through the steps I learned the hard way.
How Zoning Really Shapes Your Tiny Home Options
Here’s the blunt truth: zoning often decides where your tiny home can go before you ever buy a trailer or build a shed. I found that out after falling for a beautiful creekside parcel only to learn the zone required single-family homes over a minimum size. Zoning splits land into categories, and those categories determine whether a lot can host a towable tiny home, a permanent accessory dwelling unit (ADU), a long-term parked camper, or nothing at all. If you read those categories early, you’ll save time, money, and a lot of heartache.
Zoning controls density, utilities, setbacks, and sometimes even how things look. For tiny dwellers that means whether you can live on wheels, attach a unit to a house, or even rent your place short term. Zoning rules change too. Some places are opening up to ADUs and tiny-home friendly zones, while others still enforce minimum sizes and strict parking rules. First step: find the zoning designation for any property you care about and know exactly what it allows.
Practical start: grab the municipal zoning map and the land use code for your parcel. Look for words like accessory dwelling unit, manufactured home, recreational vehicle, and minimum dwelling size. Call the planning office with focused questions, take notes, and ask for written confirmation when you can. If the code is vague, a pre-application meeting or an informal chat with a planner will save you weeks of guesswork. If you show up prepared, planners are often willing to sketch answers and point you to past examples.
Zoning is the first filter, not the only one. Even if zoning is friendly, building codes, utility easements, or HOA covenants can block you. Document everything, map the layers of regulation on one sheet, and prioritize sites with the fewest legal hurdles. That way you spend your energy on clever space planning, not on legal battles you could have avoided.
What zoning actually controls
Zoning is your local rulebook for where things go. It covers use (residential, agricultural, commercial), density, minimum lot size, setbacks from property lines, building height, parking requirements, and utility handling. It also defines terms. Is your tiny house a dwelling, an accessory unit, or an RV? That label changes everything. Learn those definitions for your jurisdiction before you get emotionally attached to a site.
How I learned to read a zoning map
Maps look scarier than they are. Start online with the zoning map and the written code for your parcel. Don’t stop at the color. Read the code definition for the zone and then hunt for sections on ADUs, temporary structures, and RVs. I printed the relevant pages, circled the key phrases, and took them to the planner’s office. That saved me hours and avoided a second trip.
Practical steps to check your spot
- Find your parcel in the city or county GIS system. Note the zone and any overlays.
- Pull the code excerpts for “dwelling units,” “accessory structures,” and “RV/park models.”
- Call planning with one short question. Ask for an emailed or written interpretation. If you meet in person, bring a simple site sketch.
- If they say “no,” ask what would change it. A variance? An ADU permit? Sewer connection? Those are concrete targets.
When zoning is restrictive, real options
If the code blocks you as-is, there are realistic paths. Apply for an ADU permit if available. Seek a variance for size or setbacks. Consider putting the unit on a foundation if being towable triggers RV rules. Look for zones where tiny homes fit naturally, like agricultural or mixed-use areas, or seek out tiny-home friendly communities with clear rules. I once moved my unit 10 feet to meet a setback and avoided a costly variance.
Quick checklist before you commit
- Confirm the zone and read the definitions.
- Get written confirmation from planning.
- Sketch your site showing setbacks, utilities, and parking.
- Ask about inspections and ongoing compliance.
- Budget for mitigation: foundation work, hookup upgrades, or variance fees.
Treat zoning like part of the build, not an afterthought. It will keep surprises small and your daily life simpler.
Permits and Approvals: What You Really Need to Move Legally
If zoning lets you proceed, permits are the keys you actually have to turn before you move in. Most tiny-home projects need at least one permit. The list often includes building, electrical, plumbing, septic or sewer, and sometimes an occupancy permit. Early on I assumed my wheeled home would dodge most paperwork. That was optimistic. I got slapped with a stop-work notice and had a week of scrambling. Permits protect health and safety, and they protect you from fines and forced changes. Getting them right means fewer last-minute heartbreaks and more time enjoying your tiny space.
Permits shape real design choices: where plumbing stacks go, how much electrical capacity you need, and whether a loft counts as safe sleeping space. Applying for permits makes you plan real systems instead of hopeful ideas. Factor permit requirements in early and save your DIY energy for insulation and storage solutions, not redoing work an inspector will reject.
The permit process is mostly paperwork, but it’s manageable. A clear packet with drawings, system specs, and vendor quotes makes reviewers much more cooperative. Pre-application meetings where you show sketches and ask what the reviewer needs are high-return. Fees and timelines vary widely. Some places have tiny-home checklists, others treat every unit like a regular house. Learn local timelines, budget for fees, and slot permit milestones into your moving calendar.
Sometimes approvals come with conditions, like engineered foundations, certified wastewater systems, or staged inspections. Plan for those milestones and for small corrections inspectors may ask for. Hiring someone who knows local codes can be worth the cost if you want to avoid rework. For many simple placements, careful preparation and clear communication with the permitting office will get you a green light without breaking the bank.
Permits are where the plan meets reality. Get them right and you avoid stop-work orders and stress. From my first build I learned that paperwork is part of the creative process. It’s the route to a stable, legal tiny home.
Common permits you’ll encounter
- Building permit. Covers the structure, foundation or tie-downs, stairs, guards, and general building-code compliance.
- Electrical permit. Needed for new circuits, panels, and many shore-power connections. Inspectors expect correct labeling and grounding.
- Plumbing permit. For water supply, drains, and permanent municipal connections. Septic permits are separate and can take longer.
- Mechanical permit. For installed HVAC systems, venting, and some water heater or range setups.
- ADU or accessory permit. If your tiny home is an accessory dwelling unit, planning may require a specific ADU approval.
- Temporary occupancy or RV permit. Some places allow short-term living while you pursue full permits. These can be a practical bridge.
- Fire department approval. Rural or clustered sites may need hydrant info, clearance rules, or specific smoke detection standards.
How to streamline approvals
- Start with a pre-application meeting. Bring drawings, the trailer VIN if you have one, and a site sketch. Ask for a checklist.
- Submit a complete package. Missing pages are the fastest route to delays. Include floor plans, elevations, foundation or tie-down details, and spec sheets.
- Use a stamped civil or structural drawing when needed. Small fee, big time saved when the plan checker trusts your documentation.
- Stage permits. Apply for septic or sewer hookup early. Those reviews can take weeks.
- Keep one point of contact at the office and follow up politely but often. An email trail is your best friend.
Inspections, common failures, and real fixes
Inspectors focus on safe egress, secure electrical connections, and water-tight plumbing. Common fails I saw were short guardrails, unlabeled panels, and venting routed incorrectly. I once failed an electrical inspection because the subpanel wasn’t bonded. Fixing it was a 30-minute job and a reinspection fee, but it was avoidable. Review the inspection checklist before each call and save yourself the headache.
Final tips and quick checklist
- Expect fees and reviews that can take 2 to 12+ weeks depending on where you are.
- Keep permit copies on site and post the permit card where it’s visible.
- If denied, ask for a written explanation and whether a revision, variance, or appeal is the path forward.
- Invest in one good set of professional drawings. They often pay for themselves in faster approvals.
Permits are paperwork with the power to protect your tiny life. Treat them like part of the build and your day-to-day will be calmer.
Picking a Site and Hooking Up Utilities Without Losing Your Mind
Choosing a site is as much about daily life as it is about aesthetics. I adored a shaded lot under mature oaks, but the lack of nearby utilities and a tricky uphill access meant the true cost was much higher than a less scenic lot with hookups. Utilities and access shape comfort and legal options. A site with water, sewer, and reliable power simplifies permits and inspections. A remote lot may need a septic design, solar, and road work. Know what you can realistically install or pay for before you sign anything.
Utilities are the backbone of livability. Water means showers and cooking. Sewage options determine whether full-time living is feasible. Electrical capacity affects heating, cooling, and appliances, and it can influence whether a tiny home is treated like a permanent dwelling or an RV. Map utility feeds and service boundaries for any property you like. Call utility companies early and ask about tap-in fees, easements, and extension policies. Short runs can be cheap. Long runs get expensive fast.
Access and site prep matter too. Road access affects emergency response, deliveries, and the ease of moving in. Setbacks and easements limit placement. Soil and drainage determine foundation and septic feasibility. Think about winter access and flood risk. Getting a soils test or a site evaluation early gives you bargaining power and realistic cost estimates instead of guesses.
Live there mentally for a bit. Position doors for good light and privacy. Plan service access so meters and hookups are reachable without wrecking your outdoor living. If you go off-grid, design redundancy into your systems. I picked my current spot because it had good sun, a quiet neighbor, and a power pedestal on the road. I did not pick it because I wanted to dig trenches.
Site selection is where daily tiny living meets the utility world. Choose to reduce weekly hassle, not just upfront cost.
Site factors that matter more than you think
- Proximity to existing utilities. Shorter runs cut cost and contractor wait time. If power or sewer is more than 100 feet away, expect complexity.
- Access and delivery. Can a 40-foot drill rig or septic truck reach your pad? Tight turns and soft ground add big fees.
- Sun and shade. Solar likes a south-facing, unobstructed spot. Trees look great but mean shade, gutter debris, and branch-fall risk.
- Soil and drainage. Clay, rock, and high water tables change septic and trenching plans. A perc test or soil log will save surprise bills.
- Noise and visibility. Busy roads are noisy. I spend an hour at midday and at night when checking a lot.
Power: practical options and sizing basics
Decide early whether you want grid-first or off-grid. Grid hookups often require a transformer, meter, and a licensed electrician, plus lead times and line-extension fees. Off-grid is doable but needs realistic sizing and redundancy. For an energy-conscious tiny home expect roughly 3 to 12 kWh per day depending on heating and cooking. That usually translates to a battery bank of roughly 5 to 20 kWh and a solar array sized to your local sun hours. Add a generator for cloudy stretches and peak loads. Remember the difference between peak and continuous inverter ratings when you size for microwaves or induction cooktops.
Water and wastewater realities
Municipal water and sewer make life easy. When those are not available you’ll choose a drilled well, hauled water, or a spring. Wells need testing and can be expensive if deep. For wastewater, options include a permitted septic system, a holding tank with regular pump-outs, or certified composting systems where codes allow them. Septic permits and drainfields take time and site-specific design. Do not skip the soil test.
Quick utilities checklist before you commit
- Call local utility companies for line-extension quotes and timeline estimates.
- Mark and avoid easements and known underground lines. Ask for a site visit.
- Get a soil perc test and a well log or water test if applicable.
- Estimate trenching and conduit length and ask contractors about rock or frost conditions.
- Plan redundancy: battery backup, propane or generator for heat and cooking, and an easy pump-out access point.
- Spend a night on the site with the systems you plan (lights, fridge, heater) to check noise, signal, and comfort.
Tiny living is about reducing friction. Pick a site where the utilities support easy routines, not constant maintenance.
Passing Inspections and Staying Compliant Long Term
Inspections can feel like an anxiety test, but they’re really a checklist for a safe, functional home. Early on I learned that inspectors appreciate prepared, tidy work more than perfection. They want to see that systems are safe and code-compliant. For tiny homes this often means staged inspections: foundation or framing first, then electrical, then plumbing, then final occupancy. Scheduling inspections as you go keeps problems small and localized.
Compliance matters because continued legal occupancy depends on it. Fail an inspection and you might be told to stop using the space until fixes are done. That’s a headache and expense I would have avoided with checklists. The common pain points I see are electrical grounding, venting for combustion appliances, certified septic hookups, and safe egress from sleeping spaces. Address those early. Use certified contractors when code requires them and keep documentation of who did what.
Treat inspections as a cooperative step, not a battle. Bring plans, spec sheets, and permits to every inspection. Label circuits, show where major components are, and tidy the work area. If an inspector asks for a small change, ask what acceptable solutions look like instead of guessing. A short chat can keep your tiny design intact while meeting code. Clear communication speeds up approvals.
After the initial inspections, staying compliant is a habit. Keep records, file required renewals, and service systems regularly. If you modify the home, check whether you need to notify authorities. If you rent or host, be aware of occupancy and short-term rental rules. A small time investment in compliance keeps your home stable and your life calmer.
Inspections are ongoing maintenance. Think of them like oil changes for your tiny home. A little scheduled attention prevents big, sudden problems. I learned that the hard way my first winter when a missed battery alarm test turned a routine fire marshal visit into an extended follow-up.
Before an inspection. what to have ready
Treat inspections like short meetings with a stranger who wants proof your place is safe. Have these ready to show: permits and as-built sketches (digital copies work), receipts for system service (septic pumps, propane inspections), a brief maintenance log with dates, and clear access to meters and hookups. I keep a zipped folder by the door with printed copies and a spreadsheet on my phone. It speeds everything up.
Make compliance a weekly habit
Daily checks can be tiny. Test smoke and CO alarms monthly, check battery backups, peek at visible plumbing for leaks, and clear drainage after storms. Once a season, do a deeper check: exercise valves, test pump-outs for holding tanks, and inspect roof penetrations for sealant wear. Small habits avoid big fixes. I set a recurring Saturday reminder and it cuts down surprises.
If you get a notice, handle it like a pro
Read it carefully. Pictures help. Photograph the cited issue and the surrounding area. Email the inspector acknowledging receipt and outline your plan and timeline to fix it. If you disagree, request a site meeting. Most inspectors want compliance, not conflict. A cooperative tone earns more time and clearer guidance than arguing in email.
Build a relationship with your inspector
Being present, honest, and organized pays off. Show your maintenance log and ask one or two clarifying questions about what “acceptable” looks like. A short chat at the end of a visit prevents later misunderstandings and builds goodwill for quick reinspections or future questions.
Quick checklist before any inspection:
- Digital and paper permit copies.
- Recent service receipts and a maintenance log.
- Clear access to hookups, panels, and vents.
- Working smoke and CO alarms and a fire extinguisher.
- Photos of any recent repairs.
Inspections are part of being a responsible tiny dweller. A little routine saves time, money, and stress.
When Things Go Wrong: Appeals, Variances and Helpful Resources
Sometimes a rule simply doesn’t fit your plan. That happened to me when a zoning code labeled tiny mobile homes as temporary, which blocked full-time residency. The good news: many jurisdictions offer appeals, variances, or conditional use permits. An appeal or variance can be the right move when the code treats tiny homes differently than their real use. It takes patience, clear documentation, and a willingness to compromise on landscaping or technical upgrades.
Appeals matter because they let planners and neighbors consider real circumstances. Winning one usually means showing that your placement won’t harm public safety, fits neighborhood character, and has reasonable mitigation. I prepared a packet with visual renderings, utility plans, neighbor support letters, and a maintenance plan. That packet mattered at a hearing where anecdotes would not have been enough.
If appeals feel overwhelming, you aren’t alone. Nonprofits focused on affordable housing and tiny living often have templates, legal clinics, or advocacy help. Local tiny-house groups and online forums can point to successful variance requests in similar places. A short consult with a land-use attorney or planner is sometimes the most efficient route when the stakes are high. Weigh the legal cost against the long-term value of securing a stable right to occupy the site.
Think of appeals as part negotiation and part education. Offer reasonable compromises, such as extra screening, improved landscaping, or limits on rentals. Show that your tiny home is safe, well-maintained, and a positive neighborhood addition. With clear preparation and practical fixes, many “no” answers become “yes, with conditions.” Keep a list of sample letters, local contacts, and precedents before you sink money into a contested site.
What to do first after a denial
Breathe, then act fast. Appeals usually have tight deadlines. Your first move is to get the denial in writing and read the exact code sections cited. That tells you whether you’re fighting a factual mistake, a definitional gap, or a discretionary judgment. If the denial is something fixable, like a setback or screening issue, you may resolve it with a small revision instead of a full appeal.
Immediate checklist to follow.
- Request the written decision and note the appeal deadline.
- Pull the exact ordinance or code language cited.
- Photograph the site and document measurements.
- Email the planner and ask if an informal meeting or small revision could resolve it.
I once turned a refusal into a conditional OK by offering extra landscaping and moving a walkway. The planner preferred that practical fix over a contested hearing.
How to prep for an appeal hearing
Think like a storyteller and a documentarian. Put together a concise packet: a one-page summary, the code sections you contest, clear site photos, a simple site plan showing the proposed fix, and supporting documents such as other approvals nearby. Neighbor statements matter. People who will be impacted or who can vouch for safety and aesthetics carry weight.
Practice a 3-minute oral statement that lays out the problem, your solution, and why it meets the code’s intent. Be respectful and stick to facts. Bring printed copies of your packet for the board and the planner. If you need technical backing, a short signed letter from a qualified consultant is often cheaper and faster than full engineering plans.
Ask for a continuance if you need time to gather evidence. Officials usually grant one if you show progress and good faith.
Local help and low-cost resources
You don’t always need an attorney. Check with the municipal clerk about appeal forms and timelines. Look for community legal clinics, planning students at local universities, or nonprofit housing advocates who offer low-cost reviews. Tiny-home meetups and forums can share sample appeal letters and real precedent.
If the issue is technical, a short consult with a land-use attorney or planning consultant can be a smart investment. They’ll point out procedural traps, like missed notice requirements, that can win an appeal without changing your design.
Appeals mix paperwork, persuasion, and neighbors. Be prompt, organized, and offer practical fixes rather than just complaints. You’ll improve your odds and preserve energy for living well in the space you fight to protect.
What This Means for You
Rules matter as much as floorplans. The big takeaways: zoning is the first filter (know if your tiny home reads as an RV, an ADU, or a dwelling), permits and approvals are the keys to legal occupancy, site selection and utilities shape daily comfort and cost, inspections are ongoing safety checks, and appeals or variances are real tools when codes don’t fit reality. I learned these lessons with a planner and a zoning map, so take the regulatory parts seriously now to avoid fines, stop-work orders, and expensive rework later.
Practical next moves that save time and money: start with your parcel in the city or county GIS and call planning for a pre-application meeting. Put together a clean permit packet (site sketch, system specs, trailer VIN if relevant) and get long-lead items like septic or line extensions started early. Choose a site with short utility runs when possible, get a soil perc or site evaluation, and plan staged inspections and a simple maintenance log so compliance becomes routine. Build a good rapport with your inspector and document everything. If you hit a denial, prepare a concise appeal packet with photos, neighbor letters, and a mitigation plan instead of hoping the rule will change.
Do one concrete thing today and keep the momentum: pull the zoning map for a parcel you like, note the zone and code definitions, and email or call the planner with three specific questions: what counts as a dwelling, what permits are required, and what setbacks apply. Sketch your preferred site showing utilities and setbacks, and calendar a pre-app meeting this week. If you want help or want to share what you find, post a photo or a question in your local tiny-home group. Regulations are a roadmap, not a roadblock. Start mapping your route now.
Related product reviews

Best Collapsible Propane Fire Pits for Small Space Living
Compare collapsible propane fire pits that save storage, add flame ambiance, and offer safer, low-smoke warmth for small space balconies, patios and RVs.
Read more
Best Under-Cabinet Charging Drawers for Small Spaces
Find under-cabinet retractable charging drawers that free counter space, hide cords and safely charge devices for small space studios, tiny homes and apartments
Read more
Best Vertical Bike Hoists for Studios, Tiny Homes & Vans
Compare five vertical bike storage picks for studios, tiny homes and vans: a swivel wall mount, a roll-in rack, two pulley hoists and a spring lift, matched to your mount surface, ceiling height, bike weight and riding rhythm.
Read more