
Tame the Wire Nest: Small-Space Media Wall Cable Management
Published By Maya Bennett
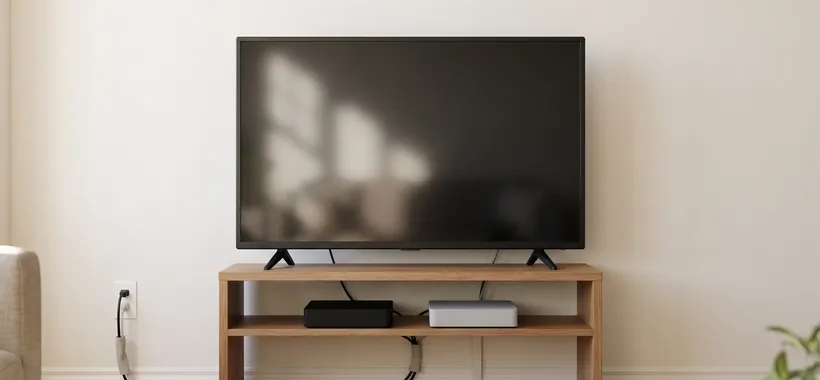
Almost every cord problem a media wall has can be fixed without drilling, cutting, or touching anything on the electrical circuit. Cords hide behind furniture, route through it, and bundle out of sight, and the small stretch that has to cross open wall gets covered. Done in the right order, the whole job comes back off the wall as clean as it went on. What the plan can't do is relocate an outlet, open a wall, or alter wiring, and that's exactly why it starts with a map instead of a cart.
The order is the advice. Audit the wall. Decide where the power strip will live, because that one decision anchors everything else. Let the furniture carry every cord it can, cover the short run it can't, and bundle what's left. Products come after the plan, and only two or three of them deserve actual money.
The mess also compounds faster in a small room than a big one, for plain mechanical reasons. One shared outlet wall funnels every device through the same corner, stacked components each bring a cord into the same few inches of space, and every run competes for the same narrow stretch of wall.
Key takeaways
- Check whether a fix is reversible, removable without damage, and free of electrical work before it earns a place on a rental wall.
- Map components, outlets, furniture paths, and excess cord before buying. The power strip's location anchors every other decision.
- Match the hiding route to your wall: furniture routing, adhesive clips, a raceway, or plain bundling each asks something different of the room.
- Leave slack where things move, loosen bundles that dent cords, and give crowded gear airflow instead of a sealed box.
- Label cords at the power strip and re-check the setup whenever a new device arrives.
What renter-safe means, and what stays off the table
Renter-friendly means something stricter here than a product listing implies. A fix qualifies when three things are true at once: it comes off, it comes off without damage, and it involves nothing inside the wall or wired to it. The removal matters as much as the installation, because removal is what the deposit actually experiences. A cover that goes up in an afternoon but leaves torn paint at move-out wasn't renter-friendly. It was renter-delayed.
Some territory stays closed no matter how clever the product looks. Running cable inside the wall is out. So is cutting drywall, whether for access or for an exit plate that needs its own wall opening. Nothing that attaches to, opens, or modifies the electrical circuit belongs here at all. That doesn't make those jobs impossible. It makes them other people's work, your landlord's or an electrician's, and the honest version of this guide declines to teach any of it.
If the real problem is the outlet itself, too few of them or one in the wrong place, that's an electrical question with your landlord's name on it, not a cord-tidying task. Everything below passes the three-part test instead, so the remaining decision is simply which reversible fix fits your particular wall.
What to map on the wall before buying anything
Mapping the wall first is what separates a plan from a fourth failed purchase. Five observations are worth writing down, and none needs more than honest eyeballing.
Start with an inventory of everything drawing a cord: the TV, the streaming box, the game console, the speakers, the lamp sharing shelf space with all of it. For each, get a rough feel for how much spare cable trails behind the stand. Slack, not cord count, is what needs hiding. Six short runs are barely noticeable. Three loops of surplus coiled in the same space are the problem, whatever the device count says.
Next comes the outlet reality check. Small rooms often have exactly one reachable outlet on the media wall, in a position chosen by whoever wired the building rather than by the furniture. That outlet is the real constraint. Everything downstream flows from it: where the stand can sit, where the strip can live, which cords can disappear entirely and which have to cross open wall.
Then the anchor decision: where the power strip lives. If the strip and the gear that runs warm, like a streaming box, a console, or a router, will sit inside or behind the stand, plan breathing room into that decision now instead of after the routing is done. Crowding heat-generating equipment into a console without airflow, or letting cords lie across its vents, traps heat. Treat this as a look-and-feel judgment rather than a measured rule, and treat the device's own manual as the authority on any specific clearance it asks for. A model whose manual discusses ventilation is worth a page turn before the plan is final. And if your actual problem is the strip itself, where it sits or how it attaches, that's a question about the strip worth its own look rather than a workaround here.
Fourth, trace the route each cord will actually take. Where does it enter the furniture, through a grommet in the back panel, an open rear, or the gap between legs? What travels near it, a drawer that slides out, a door that swings, the stand itself moving when the floor gets cleaned? A path that's clear while nothing moves can still pinch a cord the first time something does.
Last, split the runs into two groups: the ones the furniture can carry completely, and the ones crossing wall you can see. That split is the exact input the next section asks for, so record it honestly. Most small rooms hold at least a little of each.
One last pre-purchase check, and it costs nothing. Tape the plan onto the room. Run a strip of tape along the wall where a raceway would sit, outline where a cable box would land, then go about a normal day. A layout that looks sensible on a Saturday afternoon can still block the walkway when the bathroom is the destination at two in the morning. Adjust the outline while it's still only an outline.
Which hiding route fits this wall
No route below is a winner in itself. Each asks something different of the room, and the audit already supplied the chooser: an open-wall crossing, a usable furniture path, a short awkward gap, or surplus cord with nowhere to go yet.
The run crosses open wall: a raceway or cord cover
When the visible stretch between stand and strip crosses wall you actually see, a raceway or cord cover is the usual answer. What it asks of the room is worth weighing before anything else: it borrows the wall's surface out loud. The first question isn't about cords at all. It's what already uses that wall: art, a window, or the TV mount's own lines. A raceway crossing the frame you hung at eye level isn't an upgrade.
Whether it attaches with screws or relies on adhesive and the clean removal it promises is a question only your situation can answer, and this guide assumes nothing about it. The attachment method belongs in the route's choice, not at the end of the aisle. One advantage shows up at move-out: a raceway comes off as one piece rather than many small stickers, so removal touches a single spot instead of a dozen. On money, this is the one category an audit usually justifies buying outright, since nothing already in the drawer covers an open run this cleanly.
Short gaps the furniture can't reach: adhesive clips and channels
For the short, awkward runs furniture routing can't carry, adhesive clips and channels work nearly invisibly. The price they charge is contact area. Each clip brings its own small patch of adhesive to the paint or wallpaper, so a dozen of them multiply whatever the adhesive does to the surface rather than replacing it once. They suit short runs, not a whole wall.
The whole category carries one caution: some adhesives and tapes can affect paint or wallpaper. Test one on an inconspicuous spot, or a spot you'd repaint anyway, before trusting a full run. Removal is the raceway's story in reverse, many small points peeled carefully rather than one piece lifted off, manageable when it's planned and tedious when it isn't.
When the stand can carry it: routing through furniture you own
This route never touches the wall. Cords travel through the grommets, open backs, or leg gaps of furniture already in the room. Two conditions decide whether it works: the stand has to sit near the outlet, and the path has to stay clear of everything that moves. If the stand rests a few inches too far from the outlet, moving it those few inches can beat any accessory purchase.
A cable box or pouch holding the strip's bulk and the surplus cord belongs to this route too, and it carries the same condition the audit set at the strip decision: a powered strip doesn't sit sealed away with no air moving past it, nothing presses down on gear that runs warm, and the device's manual still gets the final word on any clearance it names. The cost is mostly free. The one optional spend is the box, and only if the furniture doesn't already offer the strip a spot with air around it.
The rest: bundling what you can't hide yet
Surplus cord the routes above can't relocate gets a bundle instead, and velcro straps earn their place over zip ties for a renter-sized reason: they open and close. Devices change, moves happen. A zip tie cut during a console swap is gone, and its replacement is a new purchase. A strap comes loose the same afternoon, holds together the next bundle, and leaves nothing on the wall when the cord finally moves on. The honest limit is reach. Bundling solves the snake of cables but not the visible run between stand and wall, so it complements one of the routes above rather than replacing one.
That closes the shopping list, and it's short. The categories that earn their footprint: a raceway kit for the visible run, a cable box or pouch for the strip's bulk and surplus cord, adhesive channels for the short furniture-free gaps, and a pack of reusable velcro straps. Nearly everything else this method asks for can come from items already in the room. Binder clips guide a cord along a shelf edge, labels come from the junk drawer, and the furniture is already bought. If your audit found nothing crossing open wall and a clear furniture path, the spending is zero and the setup still gets done.
What undoes the tidy wall
Five failure modes undo a tidy media wall, and each has a check cheap enough to run before the deposit or a device gets the bill. Over-tight bundles come first. A strap should hold a bundle's shape without denting a single cable under it, and where one has left a pressed ridge, loosening it takes seconds while you're still standing there.
Pinched cords don't announce themselves. Follow each run's path once, device to outlet, and look for the pressure points: behind furniture legs, along the track a sliding door travels, under a stand pushed flush to the baseboard. Leave slack wherever something moves. Slack is cheaper than a replacement cable.
Adhesive failure lands on the finish rather than the cord, and since no two finishes behave the same under tape, the inconspicuous-spot test from the routes above happens before any full run. Run the check while it's still one small spot, and the difference it buys is a finish the deposit never has to discuss.
Blocked airflow is the failure that bills in devices rather than paint, so it needs a habit, not just one planning decision. Open the console after it's been running a while and notice whether anything enclosed feels warm, whether a cord has drifted across a vent, whether one warm gadget sits flat on another. The device's manual is still the authority on any specific clearance, and the glance is still free.
Cord slack behind moving parts has a timing problem instead. Wrong-length slack shows up the first time the furniture is used after routing: a drawer sliding past a cord it now pinches, the stand drawn out an inch with everything dragging behind it. Catch it on that first deliberate use rather than the first accidental one, because the fix is cheap while it's a plan and annoying once it's a tangle.
Keeping it tidy past the first weekend
Three habits keep the setup tidy, and each is smaller than the setup itself. Label at the power strip, where the cords converge, not along the run. A tag along the back of the stand answers a question nobody asks. The question that arrives at the worst moment is which plug at the strip feeds which device, and the labels that answer it live where the cords meet. Labels earned their keep at my place the evening I pulled the wrong plug mid-movie and spent ten minutes restoring Wi-Fi instead of watching.
Tie the second habit to an event instead of a date. Whenever a new device arrives, redo only what that device touched: the one bundle it joins, the one label it needs, the one place its cord will now sit. A tidy wall that can't absorb a new gadget reverts within a season, which is usually about how long it takes for the next gadget to arrive.
The third habit is thinking about the fix's ending while it still works. Keep the velcro straps, since they move with you and close around the next bundle as readily as the last one. Pull removable pieces off deliberately when it's time to leave rather than abandoning them to whoever peels next, because a deliberate peel comes away tidy and a rushed one is what the wall's finish remembers.
So the maintenance step is a single short pass on a specific trigger, the next time something new arrives. Check that the labels still name the right cord, that nothing new got squeezed into a moving part's path, and that the console door still closes without pinching anything. Those are the same checks the setup was built on, run once more in miniature while the stakes are still small.