
Tiny Kitchen Plumbing: Layouts That Boost Workflow & Access
Last updated By Maya Bennett
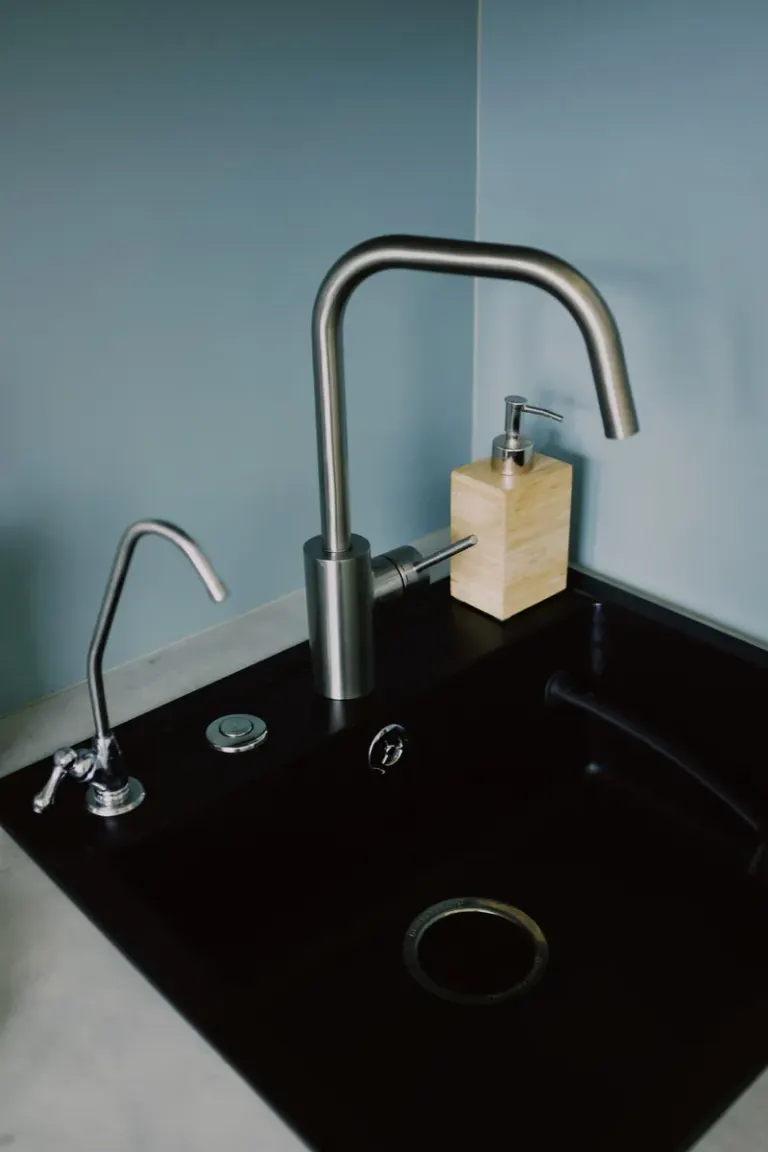
My first month in a 26-foot tiny house, I washed dishes out of a camping jug because my sink drain sat dead center under a shelf I couldn't move. Plumbing-wise, everything worked. Water came in, water went out. But every single task, from rinsing produce to filling the kettle, turned into this awkward little dance I performed three times a day.
Key takeaways
- Start Here: Assess Your Layout Before You Touch a Single Pipe
- Design for Workflow: Making a Small Kitchen Work Like a Big One
- Reroute Plumbing: Your Options From Easy Weekend Fix to Full Reconfiguration
- Code and Permits: Handle the Red Tape Before It Handles You
Not my finest planning moment.
That's the thing about tiny kitchens. The plumbing isn't just about function. It shapes how the whole space feels to live in. So here's everything I wish somebody had told me before I picked up a pipe wrench. We'll cover how to assess your layout, how to design for workflow, your rerouting options from cheap to ambitious, the code and permit stuff that keeps you out of trouble, and finally installation and maintenance so the work holds up for years. Whether you're in a van, a studio apartment, or a small home on a foundation, there's something in here for you. Let's get into it.
Start Here: Assess Your Layout Before You Touch a Single Pipe
Here's a mistake I made so you don't have to: I bought a gorgeous deep bar sink on sale before I'd measured anything. Turns out my counter run was 14 inches too short for it, and the drain location would've meant cutting a joist. Assessing your layout first sounds obvious. It's also the step most people skip, and it's the one that decides whether every other decision works or falls apart.
A real assessment means mapping more than just the sink spot. Find your existing water supply lines, your drain stack, and your vent path, because those three things are the difference between a cheap weekend and a project that eats your whole month. Measure counter depth, cabinet clearances, door swing, the space between your work zones. In tiny homes and vans, also figure out where your tanks sit and whether your floor can handle the weight of a full freshwater tank. Yeah, this part's boring. It's also the difference between a reconfiguration that flows and one you rip back out in six months. I skipped it and paid with a month of camp jug dishwashing.
Trace the plumbing you already have
Start with the three paths: water in, water out, and air (the vent, if you've got one). Open every cabinet. Shine a flashlight into the dark corners. Follow the pipes as far as you can see. One trick I like: run the faucet while your phone records from a shelf, then play it back and listen for where the pipes run. In vans and RVs, supply lines often snake through the floor or along the wheel wells. In apartments and small homes, hunt down the wet wall, the one sharing plumbing with your bathroom. That wall is gold. Running new lines inside it costs a fraction of what opening fresh framing does.
Watch the drain's downward path too. Water exits by gravity, and most codes want about a quarter inch of fall per foot of horizontal run. If your dream sink sits eight feet from the stack, you need to know whether the space underneath gives you room to build that slope. (During my own trace, I found a drain joint held together with garden hose clamps behind a false cabinet panel. Prior owner improvisation. Wonderful.) Photograph everything you find. You'll want proof of what lurks back there before you commit to cutting anything.
Watch yourself work for a few days
Here's the part nobody tells you: the best survey tool is your own routine. For two or three days, notice how you move. Where do you stand to rinse produce? How many steps to the compost bin? Does the dish rack block the drawer you open most? These little frictions add up, and they point straight at what needs to change.
Then grab a tape measure. Walkway width matters (30 inches feels comfortable, though I've lived happily with 24), plus door and drawer swing, counter depth, and the height of anything fixed. Wheel wells, water heaters, window sills. None of that moves, so flag it now and design around it later.
Sketch it before you commit
Graph paper, a free floor plan app, whatever you've got. Draw the space, mark the existing plumbing, add your obstacles. Keep the sink close to the current drain if you can, because every foot you move it adds slope complications or, in low-clearance builds, the need for a pump.
My rough sketch showed that shifting the sink 18 inches left cleared the shelf problem and reused most of the existing drain line. Eighteen inches. That tiny move ended a year of frustration, and I only spotted it once everything lived on paper instead of in my head.
Design for Workflow: Making a Small Kitchen Work Like a Big One
The classic kitchen triangle, the path between sink, stove, and fridge, still gets trotted out for tiny kitchens. Here's an opinion I've earned through two builds: forget it. When your stove, sink, and fridge all sit within arm's reach of each other, a triangle is meaningless. Tiny kitchens run on sequence, not distance.
Food should travel one direction, entry to rinse to prep to cook, with dirty dishes looping back to the sink at the end. When that flow breaks, you get the cross-traffic shuffle. Every chop means moving the dish rack. Every plate scrape means stepping around whatever you were doing. I put my compost bin across the room from the sink in my first kitchen and spent a year scraping plates into a container two steps away. Moving it changed my daily routine overnight. Good workflow design costs nothing but thought, and it pays you back every single day.
Think in stations, not triangles
Break your counter into four stations: wash, drain, prep, cook. The sink anchors the wash station, and its position dictates everything downstream. In my current kitchen the sink sits at one end of the counter run with the stove at the other, so the stretch between them does double duty as drainboard and prep space. Dishes dry on the far half. I chop on the near half. Nothing collides. That one arrangement ended the rack-juggling that plagued my first build.
Order matters more than measurements. If your drain zone sits between the sink and your cutting board, you'll move that rack twenty times a meal. Give each station its own territory, even if a territory is only a foot wide.
Give the sink a landing zone
Every sink needs counter on at least one side, and which side matters. Most people wash with their dominant hand and set dishes on the opposite side, so watch your own habit before you mount a drainboard. No spare counter at all? A flat board or roll-up rack laid across the basin makes a temporary landing spot, and it doubles as prep space when the sink sits idle.
Height counts here too. Check that your faucet clears the kettle, the tallest pot, whatever jug you fill regularly. I once lived with a faucet mounted so low I had to fill everything at a tilt, splashing water up my sleeve every single morning. Never again.
Put water where the daily jobs happen
Filling a pasta pot while it sits on the stove beats hauling water across the kitchen, so a short hop between sink and cooktop pays off three times a day. Keep your compost or scrap bin within one step of the sink, ideally in the cabinet below it. Scraping plates across the room gets old fast. Trust me. In vans and RVs, one more thing: a sink near the exterior fill port means hose water reaches your tank without snaking a hose through your entire living space.
Before you commit to any of it, mock it up. Cardboard boxes on the floor stand in fine for cabinets, and walking through one full pretend meal (mime and all) will expose every friction point a sketch hides. Yes, you'll feel silly. Do it anyway.
Reroute Plumbing: Your Options From Easy Weekend Fix to Full Reconfiguration
Sooner or later in almost every tiny kitchen project, you hit the wall where the plumbing simply sits in the wrong place. Maybe the drain is centered where you want a drawer bank. Maybe the supply lines force your sink to the far end of the counter. Rerouting is how you take control, and the good news is there's a whole spectrum of options, from a Saturday afternoon fix to a proper reconfiguration.
Once your sketch and that cardboard rehearsal tell you where the sink should go, the plumbing question comes down to distance and gravity. Reroutes come in three sizes, and the cheapest one is always the version that reuses the most existing pipe. Here's how each one plays out in real life.
The short shift: move the sink, not the lines
If your ideal spot sits within the same cabinet, or one over, you usually don't need to touch anything hidden in the wall or floor. The drain gets walked over with a new tailpiece, a couple of slip-joint extensions, and an angled trap fitting. Flexible supply lines handle the water side in under an hour. My 18-inch move came together in a single afternoon with parts from one plumbing aisle. No wall opened. No solder. No regrets.
Renters, take note: this is the most reversible option on the list, which matters when your landlord's approval ends somewhere around "swap the faucet."
Stretching the run when the sink travels farther
A few feet of distance changes the math. Supply is the easy half. PEX tubing flexes around corners without a fitting at every turn, which is a gift in a space where walls and floors are already finished. The drain is the stubborn half. Remember that quarter-inch-per-foot slope from your assessment? It's the reason longer reroutes get complicated. Twelve horizontal feet needs three inches of fall, and something under your kitchen has to hold it.
I tried to cheat this once. My first van build had a drain running nearly flat for four feet because a frame rail was in the way. It drained. Then it clogged with grease every month like clockwork. When I rebuilt it with proper slope, threading the pipe through the cabinet base instead, the problem disappeared for good. Sometimes visible pipe is the honest answer.
If your new sink spot sits far from the vent, an air admittance valve under the cabinet can often stand in for running a vent across the whole home. Whether that's legal where you live is a conversation for the next section.
When gravity refuses: pumps and uphill moves
Some layouts put the sink where water won't flow. Below the gray tank. On an island. At the far end of a van, twenty feet from everything. A small drain pump pushes sink water where it needs to go, and macerating versions can move it uphill. This is also the tier where full reconfigurations live. Opening a wall to build a new wet wall is the most invasive, priciest route, and worth a plumber's quote for the rough-in even if you handle the finish work yourself.
Honest trade-offs on pumps: they hum, they draw power, and they're one more part that can fail. Mine gurgles like a haunted aquarium every time the dishwater goes down, and guests always ask about it. I keep it anyway. It's what made my layout work, and a five-minute filter rinse every couple of months is a fair price.
A quick way to choose
- Same cabinet or the one beside it: trap parts and new supply lines.
- A few feet along one wall: PEX supply, extended drain, respect the slope.
- Across the room, below the tank, or uphill: budget for a pump and get your venting checked.
Whichever path you pick, spend ten minutes confirming what your local code says before the first cut. Some of these options are welcome everywhere. A few live in gray areas, and that's exactly where the next section picks up.
Code and Permits: Handle the Red Tape Before It Handles You
Let's talk about the least glamorous part of the whole project. When I reconfigured my kitchen drain, I genuinely considered skipping the permit. Then a neighbor mentioned that an unpermitted plumbing change can void a homeowner's insurance claim, and suddenly the $75 permit fee looked like the cheapest line item on the page.
Here's what took me years to understand: plumbing failures don't care how small your house is. A slow leak behind a cabinet soaks the same subfloor and starts the same insurance fight whether your home is 26 feet or 2,600 square feet. The rules exist to prevent exactly that, and to make sure someone qualified can vouch for the work. Even off-grid or in a tiny home on wheels, codes still touch your project. Just in different ways.
Where unpermitted work catches up with you
It shows up at three predictable moments. Insurance first. When a neighbor's supply line let go while she was at work, the adjuster asked who installed the plumbing, and her answer of "the previous owner, no paperwork" turned a covered claim into a negotiation. Then resale, where a buyer's inspector flags an improvised drain connection and your asking price becomes their discount. Refinancing bites too, since appraisers note visible unpermitted work and lenders get twitchy.
And here's what people miss: a permit inspection is a second set of eyes from someone who stares at plumbing all day. The inspector on my current kitchen caught a venting shortcut I would've lived with for another five years. That catch alone paid for the filing fee.
Know which rulebook you're playing by
Site-built homes and apartments follow the full residential plumbing code, no size discount. Swapping a faucet or rearranging trap fittings rarely requires a permit. Opening a wall to move supply lines or tie into the building's drain usually does. Plenty of jurisdictions let homeowners pull their own permits for work on their own residence, so DIY isn't automatically off the table. Ask.
Tiny houses on wheels sit in a gray zone. Some places treat them like RVs. Others want them certified to RV or park-model standards before they'll call them legal dwellings. A few count them as accessory dwelling units, with everything that implies. Where you park decides the answer, so find out before you build, not after.
Vans and RVs mostly escape building codes entirely, but gray water rules still apply. Dishwater is wastewater everywhere, and dumping it on the ground is illegal in most states and provinces. Use dump stations. They're cheap, and they keep access to public land intact for everyone.
Ask the building department, not the internet
Forums are full of confident answers written by people in different states under different codes. Your building department handles questions like yours all day, and the staff would rather explain the rules up front than argue about them after the drywall closes. Call and ask three things: whether your project needs a permit, whether air admittance valves are approved locally (some codes welcome them, others ban them outright), and whether homeowners can do their own work. Write down the code section they cite. That note settles future debates fast.
Renters, one note: the permit question belongs to your landlord. Stick with the reversible changes and get any approval in writing before the wrench comes out.
With the paperwork sorted, the physical install turns out to be the forgiving part of this whole project. That's where we're headed next.
Installation and Maintenance: Do It Once, Do It Right, Keep It Running
Install day feels like the finish line, but it's really the start of a different phase. The sequence is straightforward: rough in your supply and drain lines, pressure test everything, check for leaks at every connection, and only then close up walls or bolt down cabinets.
I skipped a full pressure test once because I was eager to finish. Found the drip the hard way, three days later, under a cabinet I'd just loaded with supplies. The mindset shift that took me two builds to learn: the fittings themselves are the easy part. The habits around them decide whether your plumbing disappears from your life or becomes a recurring character in it. The upside of tiny kitchen plumbing is that it's often easier to maintain than a full-size house, mostly because you can see and reach more of it.
Dry-fit the whole run before you commit
Assemble everything loosely first. No primer, no cement, no final tightening. Just check that the trap aligns with the drain, the tailpiece clears the drawers, supply lines reach the shutoffs without stretching, and nothing kinks where you can't see it. My current kitchen dry-fit caught a tailpiece angled straight into a drawer slide, something I never would've spotted working from memory. Ten minutes of pretend assembly saved a return trip to the store.
Then commit, with restraint. Slip-joint nuts go hand-tight plus a quarter turn with a wrench. That's it. I once cranked a nylon slip nut "for good measure" and heard the crunch of plastic giving up. It held for a week, then started weeping. Compression fittings and plastic threads reward gentleness. Four wraps of thread tape on threaded joints, clockwise, and move on.
Test it like you have to live with it
Before any cabinet panel goes back on, run water the way real life will. Hot first, then cold, then fill the basin completely and pull the stopper so the trap takes a full surge. Wipe every joint with a dry paper towel, which shows a weep instantly, then check again the next morning. Slow drips love to wait until you've put the tools away. (They know. I'm convinced they know.)
Photograph the finished plumbing from two angles before you close things up. Future you, elbow-deep in a clog someday, will want that map.
Five minutes a month beats a weekend of repairs
Maintenance in a tiny kitchen is mostly looking. Once a month, take a flashlight and a dry paper towel under the sink. You're hunting damp spots, green crust on copper, rust staining at clamps. The cabinet floor under my first sink was swollen for months because of a weep nobody ever looked for. Don't be me.
Once a season, pull and clean the P-trap, or at least flush it with a full basin of water. Skip harsh chemical drain cleaners in small-diameter lines. Removing the trap and clearing it by hand takes fifteen minutes and doesn't risk your seals. Van and RV builds need one extra pass: check hose clamps and line routing, because vibration loosens things in ways parked plumbing never experiences. If your home sits unheated through winter or empty for a few weeks, drain the lines or pour a splash of RV antifreeze into the trap. A dried-out trap invites sewer gas, which is a smell you only need to meet once.
Keep a small pouch under the sink with spare slip washers, hose clamps, and thread tape. Every item in mine has rescued a Sunday night.
That's the whole arc. Plan the flow, respect the rules, install with patience, check in now and then. My sink and I have been getting along for three years, and the peace started the day I stopped treating the plumbing as an afterthought.
What to Remember
The short version: assess before you buy anything, design for sequence instead of triangles, reroute only as far as the job demands, clear the permit question early, and install like you have to live with it. Because you do. Each stage feeds the next. Your two-day movement survey tells you where the sink belongs. Your sketch reveals whether an 18-inch shift solves everything or whether you're looking at PEX, honest quarter-inch slope, a drain pump, or a brand new wet wall. And that five-minute call to your building department decides which options are even legal where you live. None of it ends on install day, either. The dry-fit, the paper towel test, and the monthly flashlight check under the sink are what keep plumbing invisible. Which is exactly what good plumbing should be.
My single best piece of advice: choose the smallest fix that solves the real problem. My 18-inch sink move ended a year of frustration and reused most of the existing drain line. Resist the urge to rip everything out just because you own the tools. Resist the urge to trust your memory, too. Dry-fit the whole run, mock up the layout with cardboard boxes, and walk through an imaginary meal before anything gets cemented. (Random confession: I still own that camping jug from my first month of tiny living. It rides in the van now as a low-budget monument to planning ahead.) The calmest tiny kitchens I've ever visited don't belong to people with fancy fixtures. They belong to people who respected gravity, asked the building department instead of a forum, and peek under the sink once a month.
Your next step costs nothing. This week, spend two or three days watching how you really work in your kitchen. Where do you stand to rinse? What blocks what? Then sketch the space, trace the lines you can find, and list your fixed obstacles. Wheel wells. Window sills. Make the phone call and ask your three questions: does this need a permit, are air admittance valves approved locally, and can a homeowner do the work? Renters, get written approval and stick to the reversible stuff. If the answer is a short shift, you're one hardware store run from a Saturday project. If it's a full reconfiguration, you're one plumber's quote away from a real number instead of a guess.
So go take the measurement. Tonight, even. A tape measure, a flashlight, a sheet of graph paper, twenty minutes. That's the entire barrier between you and a kitchen that works with you instead of against you. And when you've traced your lines or found your own 18-inch fix, come back and tell me about it in the comments. I read every one, and some of my best ideas have been shamelessly stolen from readers. Subscribe if you want more small-space projects that respect both your square footage and your sanity. Your kitchen isn't too small. It's just waiting for a better plan.
Related product reviews

Best Over-the-Sink Cutting Board Systems for Small Apartments
Reclaim sink space with top over-the-sink cutting board systems that streamline prep, draining, drying, and storage in a small apartment kitchen.
Read more
Best Under-Cabinet Retractable Dish Racks to Save Counter Space
Compare under-cabinet retractable dish racks that free counter space, with quick-dry designs, utensil and glass holders, and mounting for kitchens and RVs.
Read more
Best Over-Cabinet Drying Racks for Kitchens, RVs & Camper Vans
Find over-cabinet drying racks that free countertops, boost vertical drying, and add multi-use storage for kitchens, RVs, camper vans and studio living.
Read more