
Custom Joinery for Awkward Nooks: Maximize Storage & Style
Last updated By Maya Bennett
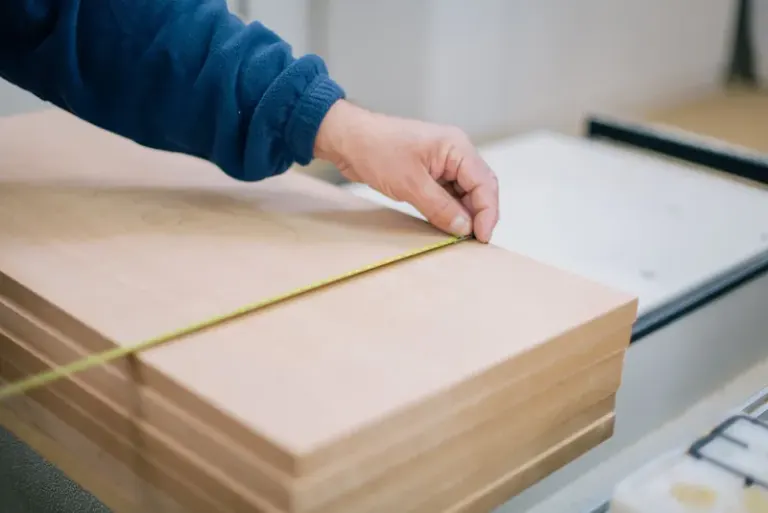
If you're like me, you've stood in front of a tiny, awkward corner and wondered whether it's wasted space or the secret feature your home has been hiding. I once had a studio with a sloped ceiling and a skinny alcove that felt impossible to use, until a shallow bench with hidden storage and a slim bookshelf finally made the whole room breathe. Small spaces can feel limiting, but they reward clever, tailored solutions.
Key takeaways
- Read the Room: Smart Site Assessment for Awkward Nooks
- Design Options That Make Small Nooks Shine
- Joinery Methods That Work in Tight Spaces
- Installation and Cost: Planning for Smooth Execution
This post walks you through turning those awkward nooks into purposeful, beautiful joinery that improves light, flow, and function. We'll cover five practical areas: site assessment, design options, joinery methods, installation and cost, and finishing and maintenance. Expect hands-on measuring tips, material choices that read light and scale correctly, and clear advice on when to DIY and when to call in help.
If you like the idea of every inch pulling its weight, you're in the right place. I’ll give you the skills and questions you need before you commit to a design, point out common pitfalls, and nudge you toward straightforward, satisfying results.
Read the Room: Smart Site Assessment for Awkward Nooks
When I start a small-space project I don’t rush to sketch. First I read the room: I measure how light moves, notice sightlines, and watch how people naturally move through the space. A proper site assessment is more than numbers. It’s about where daylight pools, where the eye lands, and the hidden stuff behind the walls that will limit your options.
Getting this right saves time and money. In tight quarters every millimeter matters. A bad measurement can mean gaps, extra trim, or a redesign. I’ll share simple measuring tricks, the tools I use, and how to map constraints so your joinery fits like it belongs, not like an afterthought.
You’ll also learn which constraints to honor and which you can work around. For example, keeping a window view might beat squeezing in another drawer. Sketching and documenting the site keeps your design choices honest and practical.
Walk the space like you live there
Spend 10 to 15 minutes in the nook at different times of day. Sit, kneel, stand back. Notice how light changes, where shadows fall, and if you can feel drafts or heat. Does your eye stop at a harsh edge or glide along a continuous line? Those little observations tell you whether the joinery should anchor the corner or float so the room flows.
Document physical constraints
Take clear photos from multiple angles, including ceiling, floor, and the walls beside the nook. Measure height, width, and depth at three points (left, center, right). Note slopes, trims, and floor transitions. Mark vents, radiators, ducts, pipes, electrical outlets, and switches. Use a stud finder and confirm if walls are load bearing. If a wall hides plumbing or wiring, mark it so you don’t accidentally block access.
Light, sightlines, and visual flow
Map how light travels through the space. Is there a window you want to celebrate, or a doorway that defines how people see the nook? Try to extend existing horizontal lines or create a gentle pause instead of a hard stop. Lighter materials and reflective surfaces expand perceived volume. Recessed shelving, slim returns, and low-profile hardware help keep sightlines open.
Function mapping and multi-use thinking
Decide what the nook must do. Read, store, sleep, display, or work? Rank those needs. If you want the space to do two things, layer solutions. A narrow bench with shallow drawers and a flip-up table can be seating and a workspace without blocking circulation. Plan clearances for chairs, doors, or appliances, and always include maintenance access where plumbing or wiring is nearby.
Structural and safety checks
Tap the wall and listen. Soft spots can mean rot or hollow areas that make anchoring tricky. Look for moisture stains, flaking paint, or salt deposits. Check that floors are level and walls are plumb. If you see crumbling plaster, hidden mold, or major unevenness, get a contractor involved before building. Safety and secure anchoring turn lightweight joinery into something that feels permanent.
Quick site-assessment checklist
- Photos from multiple angles
- Three-point measurements (height, width, depth)
- Studs, outlets, vents, and pipes marked
- Ceiling slopes and floor transitions noted
- Light path and sightlines observed at different times
- Function priorities listed
- Clearance and movement spaces measured
- Any signs of moisture, rot, or structural issues recorded
A good site assessment turns unknowns into design opportunities. It helps your joinery amplify light, guide the eye, and make every inch useful.
Design Options That Make Small Nooks Shine
Once you understand the space you can choose designs that add light and function instead of crowding the room. Options range from single floating shelves to benches with hidden storage, fold-down desks, and custom window seats. The right choice balances visual flow, scale, and the activities you want the nook to support.
Thoughtful design makes a nook feel intentional and part of the room. I aim for modularity, smart negative space, and a rhythm that reads cohesive. Keep corners airy with narrow profiles, reflective backs, and open shelving that preserves sightlines and natural light.
Below are practical directions and style-function pairings so you can match the aesthetic to the use-case.
Bespoke seating with hidden storage
A built-in bench is one of the fastest ways to turn an awkward nook into a feature. It’s a low, horizontal anchor that draws the eye and offers tactile comfort. Use shallow, full-width drawers or lift-up lids to hide blankets, shoes, or seasonal items. Tip: aim for a seat height of 16 to 18 inches. Add a light, washable cushion so the nook feels cozy without looking heavy.
Slim vertical and corner shelving
When floor space is tight, go up. Tall, narrow shelves and corner towers use vertical real estate and keep the floor clear. Stagger shelf depths so the outer edge looks slim from the main sightline. For a lighter look, leave the lowest shelf open or add tapered legs so the base reads airy.
Floating elements and minimal reveals
Floating desks, shelves, and cabinets keep visual flow because they don’t interrupt the floorplane. A cantilevered desk 12 to 18 inches deep gives you a usable workspace that doesn’t block circulation. Keep returns and side panels minimal, and finish the underside to match the wall so the piece seems to emerge from the surface rather than sit on it.
Fold-away and transforming joinery
Moveable designs multiply function. A drop-leaf table flips into a dining surface and disappears when you don’t need it. A headboard with a fold-down desk or a Murphy bed framed by vertical storage gives you two uses without extra bulk. Plan clearances for moving parts and choose soft-close hardware for smooth, quiet operation.
Integrated light and reflective backings
Light creates depth. Recess LED strips under shelves or inside cubbies so storage recedes and objects glow. A mirrored or glossy back panel on shallow shelving doubles perceived depth and bounces light into dim corners. Use warm LEDs for reading nooks and put them on dimmers so you can tune mood and perceived size.
Material and scale choices that widen space
Pick materials that read light: pale woods, matte whites, and subtle-grain laminates keep joinery from dominating a room. Keep moldings and profiles slim. Scale shelving to the things you actually own. Deep, oversized shelves swallow space; shallower, more frequent shelves display objects and let wall color show through, which visually expands the nook.
Good design options solve more than one problem. Give the nook a primary function, then layer secondary uses. Small, intentional moves make a corner feel designed, not patched.
Joinery Methods That Work in Tight Spaces
Choosing joinery is where design meets craft. In small spaces your decisions affect durability, weight, and the clean lines you want. Techniques range from simple butt joints with screws to concealed biscuits, dowels, dados for shelving, and pocket screws for hidden strength. Each choice has trade-offs in appearance, strength, and the tools you’ll need.
This matters because joinery determines how seamless and long-lasting a piece will be. In cramped conditions you often want joints that avoid bulky hardware, keep profiles slim, and let you fit precisely against imperfect walls. Below are the approaches I use most often, with tips so your piece reads light, lasts, and performs.
Joinery Methods
Good joinery makes custom pieces feel inevitable rather than bolted-on. The methods you choose shape not only strength, but how light and sightlines move through a nook. Below are practical joinery approaches I use for small-space work, with quick tips so your piece reads light, lasts, and performs.
Simple, invisible joins for a clean look
Use dados and rabbets to seat shelves and panels so joints disappear into the finish. Biscuits and dowels add alignment and shear strength without visible hardware. For plywood carcasses, glue plus a few concealed screws is usually enough when joints fit tight. The result is a smooth plane that lets wall color and reflected light do the work.
Strength where it counts
Load-bearing pieces like benches or tall towers need solid connections. A full-depth dado or a stopped dado transfers weight into the carcass. Reinforce corners with splines or glued cleats, then screw them for extra security. Add a thicker front rail or hardwood edging at wear points so edges resist dents and look good over time.
Lightweight construction that still feels solid
Keep the feel airy by building with cabinet-grade plywood and limiting deep shelves. Use hollow or framed carcasses to cut weight. Edge-band exposed plywood so it looks finished from every angle. Pocket screws and cam-lock fittings speed assembly and are forgiving for DIY builders. Shelves should generally be shallower rather than deeper to reduce sag and visual bulk.
Mounting and removable solutions
A French cleat is my go-to for removable cabinetry. It spreads the load and lets you lift the unit into place like slipping on a jacket. For slimmer profiles, use concealed floating brackets or keyhole slots. Leave a small service gap behind units if they might need to be pulled away for access or airflow. Those tiny allowances make a big difference later.
DIY vs pro: a quick guide
Take the DIY route if your project is mostly straight cuts, dados, dowels, and pocket screws. Those techniques are forgiving and work well with a circular saw, router, and clamps. Bring in a pro for curved work, complex plumbing or electrical integrations, or when you must fit flush to old, uneven walls. I call a pro for structural seating or when finish tolerances need to be millimeter-perfect.
Quick build steps for a shallow built-in shelf:
- Cut top, bottom, sides, and adjustable shelf pieces from plywood.
- Rout 3/4-inch dados for shelves and dry-fit.
- Glue and clamp, add pocket screws for reinforcement.
- Edge-band visible edges, sand, and finish before mounting with a cleat.
Good joinery is invisible muscle. Get the method right and your nook will feel intentional, light, and ready to live in.
Installation and Cost: Planning for Smooth Execution
Installation and cost planning turn a good idea into a good result. Tight spaces bring challenges like narrow doorways and staircases that determine how pieces are built and brought in. I’ll walk you through modular versus assembled approaches, delivery and site limits, and the permits or code checks that sometimes apply.
Surprises on install day are pricey and demoralizing. We’ll break down common cost drivers like materials, joinery detail, labor, and finishes. I’ll also share ways to control costs: phased installs, using standard sizes, and mixing DIY work with pro trades for the tricky bits.
With reasonable planning you can keep the project on budget and maintain the visual flow and light that made the design work in the first place.
Installation roadmap
Do a final site check the morning of install. Confirm measurements, stud locations, and that any required tradespeople have finished rough-ins. For most shallow shelves and benches the sequence is: assemble off-site where possible, dry-fit in place, shim and level, secure fastenings, fill and finish gaps, then install hardware and cushions. Larger built-ins often need temporary supports during fitting and a final trim run to reconcile old walls. Trades usually measure twice and make one intentional adjustment to preserve clean lines.
Typical timelines: a floating shelf or slim corner unit can be done in a day. A bench with drawers usually takes two to three days including finish time. Full-height custom cabinetry or integrated seating with finish carpentry often runs one to two weeks, depending on site complexity and curing times.
Typical cost breakdown
Costs vary by material, finish, and labor. Ballpark figures (USD) for a single nook project:
- Simple shelving or a small floating desk: $150 to $700
- Slim bench with storage or a modest built-in: $700 to $2,500
- Full custom cabinetry or integrated seating across a wider span: $2,500 to $8,000+
Component split: materials often make up 30 to 50 percent of the total. Labor and installation are 40 to 60 percent. Finishes, hardware, and lighting add the rest. Add a 10 to 20 percent contingency for wall repairs, small structural tweaks, or unexpected site issues. If you need electrical work or plumbing access, budget separately for certified trades.
Ways to save without sacrificing style
Assemble modules off-site to cut on-site labor hours. Choose cabinet-grade plywood over solid hardwood for a lighter, less expensive look that reads high-end when edge-banded and painted. Standardize dimensions so you can use off-the-shelf hardware and avoid custom parts. Paint or light-reflective finishes can be more effective and less costly than expensive veneers. Stagger the work: install the carcass first and add trim after walls are painted to avoid masking and touch-ups.
A little extra planning up front keeps lines clean and light flowing. The result will feel custom, not cramped.
Finishing and Maintenance: Keep Your Nook Looking and Working Great
Finishes and maintenance determine how your joinery ages in a small space. The right finish protects surfaces, bounces light, and keeps everything looking cohesive. Choices range from durable clear coats to matte paints that hide small flaws, and lightweight laminates that mimic pricier materials.
Small rooms show wear faster, so finishes matter. I’ll cover durability, moisture resistance, and cleaning ease, plus hardware picks like soft-close hinges and concealed slides that improve function without cluttering the look. You’ll also get simple maintenance routines and quick repair tips to keep the nook feeling intentional.
Finishes that read light and last
Pick a finish that supports the room’s visual flow. I prefer low- to mid-sheen paints for painted joinery because they reflect light softly and hide small imperfections. For wood, a thin satin or hard-wax oil keeps warmth and shows the grain without glare. In small rooms a continuous color across trim and joinery helps pieces disappear into the wall so the room feels larger.
When finishing, work from the inside out. Seal internal surfaces first, like shelf boxes and drawer interiors, to reduce moisture migration. Sand between coats with fine grit so finishes go down silky and even. Keep a small can of the exact finish for future touch-ups, and save a 2-inch spare board or edge-band sample with your project paperwork. It saves time and keeps repairs invisible.
Sealing and protecting vulnerable areas
Entryways, kitchenettes, and wet zones get the most abuse. Use tougher topcoats in those spots: water-resistant polyurethane on horizontal worktops, hard-wax oil on seating. Line drawer bottoms and open cubbies with replaceable liners for crumbs and spills. For window seats choose washable, quick-dry fabrics with zip-off covers so sunlight and daily use don’t speed wear.
Don’t put porous materials directly against a bathroom wall without a proper waterproof barrier. If plumbing sits behind joinery, leave an access panel and run sealant where panels meet tile or cement to prevent moisture intrusion.
Daily care and quick maintenance checks
A light weekly wipe with a soft cloth and mild soap keeps finishes fresh. Avoid abrasive pads and harsh solvents. For wood I use a barely damp cloth, followed by a dry wipe. For painted or laminated surfaces a gentle all-purpose cleaner is fine.
Inspect hardware monthly. Tighten loose screws, test soft-close mechanisms, and lubricate runners or hinges once a year with a dry silicone spray (avoid oil-based products that attract dust). Check LED strips and bulbs as needed and keep spare connectors on hand.
Small repairs that keep everything feeling custom
For shallow scratches use a wax fill stick or a color-matched marker. Deeper gouges benefit from a thin overlay of matching veneer or a small epoxy repair, sanded and recoated. Repaint trim panels in place if gaps appear, but keep touch-up paint for precise spot work.
I aim for small monthly checks, light cleaning weekly, and one annual tune-up. In tight rooms that routine preserves the calm visual flow that makes a nook feel like it always belonged.
The Takeaway
Awkward nooks don't have to be afterthoughts. Start by reading the room: spend 10 to 15 minutes in the space, take three-point measurements, photograph details, and mark studs, vents, and plumbing. Choose a primary function and design around it, then layer secondary uses. A low bench with hidden storage, slim vertical shelving, or a floating desk will often do more for a room than a lot of shallow, heavy shelving.
Match joinery to the job: dados, biscuits, dowels, pocket screws, or a French cleat for removable units will make pieces feel built-in rather than bolted-on. Finish with cabinet-grade plywood and edge-banding, low- to mid-sheen paint, integrated LED strips, and soft-close hardware so the nook reads light and lasts. If you go DIY, pick projects with straight cuts and forgiving joinery and assemble modules off-site. Call a pro for curved work, plumbing or wiring integrations, or seating that needs millimeter-perfect tolerances. Budget a 10 to 20 percent contingency for surprises.
Want to try something small? Spend an afternoon doing the site-assessment checklist, sketch a simple floating shelf or slim bench, source some cabinet-grade plywood and edge-band it, and dry-fit before you finish. If you want feedback, share a photo of your nook and I’ll help you size and prioritize the first move. Make that inch of space earn its keep this week.
Related product reviews

Best Acoustic Art Panels with Shelving for Small Space
Discover acoustic art panels with built-in shelving for small space - absorb echoes, reclaim floor space, and stylishly display plants, books, and tech gear.
Read more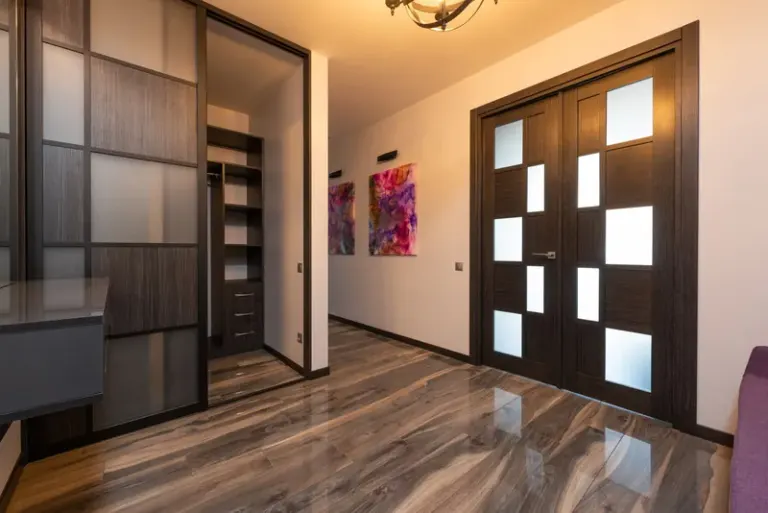
Best Mirrored Sliding Doors with Integrated Art for Small Spaces
Discover space-saving mirrored sliding doors with integrated art that open your small space, hide clutter, add style, and unlock multifunctional rooms.
Read more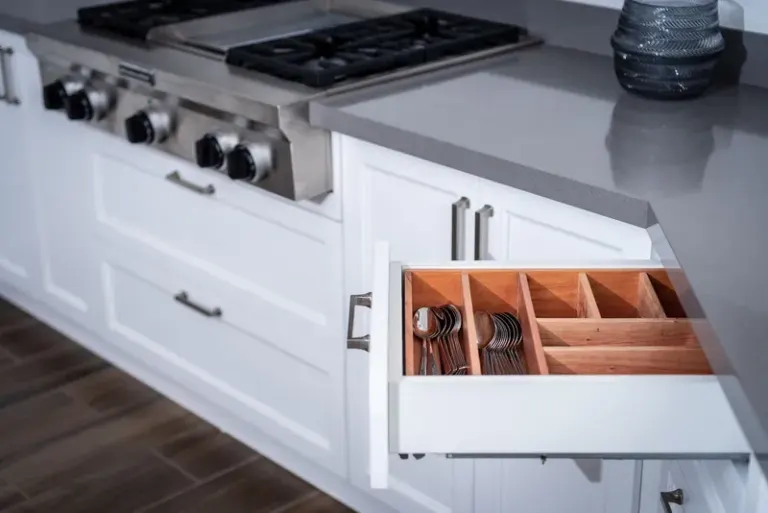
Best Under-Cabinet Charging Drawers for Small Spaces
Find under-cabinet retractable charging drawers that free counter space, hide cords and safely charge devices for small space studios, tiny homes and apartments
Read more