
Foldaway Craft Zone: Maximize Workspace & Storage in a 100 sq ft Studio
Last updated By Maya Bennett

Have you ever stared at a blank wall in a tiny studio and wondered if you could carve out a full craft zone without losing your living space? I sure did. When I moved into my first 100 sq ft studio I bolted a fold-down table to a closet door and learned fast that planning beats brute force. This post walks through how to turn that tiny footprint into a flexible, foldaway craft zone that tucks away cleanly when you want to relax.
Key takeaways
- Start Smart: Assessing and Planning Your Tiny Craft Zone
- Storage That Works: Smart Solutions for Supplies and Tools
- Foldaway Furniture: Make Your Workspace Disappear When You Need Space
- Layout Examples: Real Configurations for Common Crafting Needs
You’ll get hands-on steps for assessment and planning, storage hacks that keep supplies tidy and within reach, foldaway furniture ideas that actually work, layout examples that fit common hobbies, and budget-friendly maintenance tips to keep everything useful for years. Expect measurement tricks, safety reminders, and practical tradeoffs so you can build a craft area that fits how you make things. Ready to optimize every inch? Let’s get into the five key areas and sketch a studio that helps you create, instead of fighting you for space.
Start Smart: Assessing and Planning Your Tiny Craft Zone
Ever try to set up a project only to discover there’s nowhere to put your tools? Start with a quick, honest assessment. Measure the floor area, ceiling height, where windows land, and where outlets are. Note fixed obstacles like doors, radiators, and built-ins. Sketch a plan to scale on grid paper or use a free room planner online. You want to spot constraints and opportunities before you buy or build anything.
Mistakes are magnified in a 100 sq ft space. Map your workflow: what do you do first, next, and last? Carve zones for cutting, assembling, drying, and storage, and keep the most-used tasks near good light and power. Think vertical and watch sightlines so the room still looks inviting when you fold things away. Do this and your furniture and storage choices will actually match how you work.
Start with a needs audit. Be honest about how you actually craft.
Walk a single project through from start to finish and write down every tool, supply, and step. Are you slicing huge foam boards or doing delicate hand stitching? Do you need a sewing machine, laptop, and lamp at once, or just one at a time? Treat bulky items differently from consumables. I once thought ribbon and thread could share the same box. They could not. This audit tells you what must live within arm’s reach and what can sleep on a high shelf.
Measure, map, mock.
Take three key measurements: floor footprint, wall height, and depth clearance including swinging doors. Mark the footprint with painter’s tape and walk around it like you’re actually working. Cut cardboard templates for a fold-down table and for big gear like a sewing machine (most small machines are about 16 to 18 inches deep). Mark reach zones on the wall at sitting and standing heights, and find the studs (they’re commonly 16 inches on center). Note all outlets and switches. If you can’t hit a stud where you need one, plan a plywood backer or proper anchors.
Prioritize storage by frequency and weight.
Put heavy things low and close to where you work. Keep daily tools in the 3 to 5 foot vertical zone so you can grab them without standing up. Stash rarely used supplies above head height or behind doors. Open trays or shallow drawers are great for things you reach for constantly. Use small clear containers for tiny bits and label honestly - boring now, time-saving later.
Plan your foldaway mechanics and safety.
Decide how the surface will fold and how much clearance it needs when down and when stowed. For a sturdy DIY fold-down table use 3/4 inch plywood or reinforce 1/2 inch with cleats. Use continuous hinges or heavy folding brackets rated above your expected load, and anchor through the backing into studs or a plywood backer. Estimate the combined weight of your tools and tabletop and choose fasteners with a comfortable safety margin. Don’t skimp on anchors.
Set a realistic timeline and budget.
Break the project into stages: inventory and mockup, build the main surface, install storage and lighting, then tweak ergonomics. Budget a few dollars for surprises like extra fasteners or a small backing panel. Expect a weekend for a basic fold-down table and storage, and two to three weekends if you want to perfect layout and finishes. Small, steady wins keep the studio usable while you build and cut down on rework.
Storage That Works: Smart Solutions for Supplies and Tools
Storage makes the difference between a calm creative space and a chaotic one in a tiny studio. Make supplies visible and reachable so you can grab them without pulling the room apart. Wall-mounted systems-pegboards, rails, modular shelving-lift things off the floor. Clear stackable bins and labeled drawers tame tiny bits, while vertical cubbies and tall cabinets hold larger materials. Work in zones: daily items close, bulk and seasonal stuff tucked away.
Don’t forget hidden and mobile storage. Under-bed drawers, rolling carts, and bench seating with internal compartments add capacity without stealing floor space. Magnetic strips and shallow trays turn narrow gaps into tool holders. Proper storage also protects supplies from dust and moisture, which matters in compact living. Below are specific builds and configurations that balance capacity, cost, and quick access.
Vertical smart storage
When floor space is precious, build up. Mount a narrow pegboard or slotted metal panel on a tall strip to keep tools visible and off work surfaces. Mix hooks for scissors and pliers, small baskets for glue sticks, and angled shelves for jars of buttons. For spools, mount a short dowel or a row of small PVC tubes horizontally so ribbon and thread pull off without tangling. Keep the most-used items at eye level and move less-used stuff higher or behind a curtain.
Foldaway and hidden compartments
Make storage that goes away with the workspace. Under a fold-down table build a shallow hanging shelf 10 to 12 inches deep that stays attached when the table is stowed. Cut plywood to size, add a front lip to stop things sliding, and screw it to the underside of the tabletop cleat. For tiny bits, glue magnetic tape inside the front lip and use metal tins for beads and needles. A drop-front cabinet door can double as a shelf when open. Piano hinges give a slim profile that packs flat.
Mobile, tuck-away solutions
A shallow rolling cart is a tiny studio hero. Pick one no taller than the underside of your folded table so it slides completely out of sight. Organize it with clear shallow trays and label the sides. Wheels let you move tools to an alternate spot or roll the whole setup outside on a nice day. For heavier tools, add a small lockable box to keep things secure and consolidated.
Small-item systems and hacks
Tiny supplies need tiny homes. Reuse ice cube trays, hardware organizer inserts, or shallow craft drawer inserts to corral findings. Group by task (sewing, gluing, finishing) rather than by material. Label lids with a quick photo or short note so you can grab the right container without riffling. Store patterns and paper flat in an underbed portfolio that slides under furniture. For thread and needles, a tackle box or bead organizer with removable dividers works better than a table full of jars.
One practical finishing touch: choose a single visible surface for a tidy zone. A clear box or tray with current-project essentials makes your craft area look calmer when guests drop by, and it turns cleanup into a five-minute habit. These small systems, kept tidy daily, are what make a tiny studio feel roomy.
Foldaway Furniture: Make Your Workspace Disappear When You Need Space
Foldaway furniture is the MVP of a multifunctional craft studio. A well-made fold-down table or Murphy-style workstation gives you a solid surface when you need it and then disappears so you can actually move around. Think drop-leafs, wall-mounted fold-out desks, hinged cabinets with tabletops, and nesting tables that stack away. Match the mechanism to the load and how often you’ll use it: piano hinges and cleats work for lighter tasks, while gas struts or locking brackets help with heavier setups.
Mounting and ergonomics matter as much as looks. Plan knee clearance, a comfortable working height, and anchor into studs or masonry. Choose chairs that fold or tuck under the unit. Dual-purpose pieces, like a fold-down sewing station with built-in storage or a dining table that doubles as a cutting station, give maximum utility. Below are practical pieces, DIY tweaks, and installation notes for building reliable foldaway furniture on a budget.
Practical foldaway pieces for crafting
Wall-mounted flip-top desks and drop-leaf cabinets are incredibly versatile. Use a flip-top for light paper work. Choose a drop-leaf with a shallow internal shelf so supplies live inside the closed cabinet. For heavier tasks pair a fold-down surface with removable or nesting legs for extra rigidity when needed and total clearance when stowed. Consider a vertical panel that unfolds shelving on one side and a table on the other. Small foldout ironing boards and collapsible drying racks are lifesavers for textile projects.
DIY modifications that make a big difference
A few simple mods go a long way. Make a reversible tabletop: cutting-mat-friendly laminate on one side and a wipe-clean hardboard on the other so the same surface handles cutting and messy glues. Add a grommet or notch for power cords so lamps and machines stay plugged when the table folds. Use removable stabilizing legs that slot into metal plates and tuck away inside the cabinet. If you need lift-assist, lightweight gas struts are great for big panels, but match the strut capacity to the panel weight and follow safety instructions.
Small touches matter. Route a shallow lip into the table edge to stop rulers and jars from rolling. Stick felt pads where surfaces meet to quiet the clatter. Paint the interior of a foldaway cabinet a bright color or add a small mirror to bounce light onto your work.
Ergonomics and layout tips
Measure seated and standing working heights before you finalize the surface. Sitting tabletop height is usually 28 to 30 inches, but check your posture. Leave at least 24 inches of knee clearance and a minimum 30 inches width for a comfortable machine station. Plan lighting so a mounted task lamp or strip light fits inside the cabinet and can be switched on when the unit is open.
Concealment and finishing
Make the closed unit read like a wall panel or slim cabinet so the studio feels bigger. Use flat-faced doors, continuous vertical grain, or a curtain that matches room textiles. Keep visible hardware minimal for a tidy look.
I’ve replaced more than one clunky table with a slim foldaway unit. It saves space and keeps the creative mess manageable. With a few practical tweaks, a foldaway piece becomes a long-term workhorse in a 100 sq ft studio.
Layout Examples: Real Configurations for Common Crafting Needs
Seeing layout options makes the decisions feel doable. Below are compact floorplans for common scenarios: a papercrafter who needs flat storage and table space, a stitcher who needs a sewing machine and ironing station, a mixed-media maker who needs drying space, and a hybrid living-craft case where the craft zone shares the room with a bed. Each example highlights dimensions, clearance ideas, and which pieces fold or roll away.
Respect natural light and power. Put cutting and assembly near a window, power tools near outlets, and designate a foldaway surface for overflow. I’ll point out anchor points, circulation minimums, and how to phase upgrades so you can start small and improve as you go.
Compact Sewing Nook (machine-first)
Mount a wall fold-down surface about 30 inches wide by 18 inches deep at a seated height near 29 inches. Give yourself about 36 inches of wall width so a machine and a small extension table fit when you need it. Put a slim shelf 6 to 12 inches above the table for thread and feet, and use a swing-arm lamp that tucks inside the cabinet when closed. Workflow tip: position a folding cutting board or pull-out tray to the left or right so fabric feeds in a straight line. Setup or stow time: under two minutes.
Paper- and Mixed-Media Corner (flat work, accessible surface)
Use a 36 by 24 inch fold-down top mounted at standing height (38 to 40 inches) for trimming and gluing. Mount narrow vertical storage above with labeled shallow bins for paper, pens, and adhesives. Leave a 30 inch clear path in front so a chair or trolley can roll in and out. If you also need laptop time, make the surface reversible: one side self-healing, the other laminated for clean work. Keep a current-project box so you can clear the surface for dinner in under five minutes.
Jewelry and Detail Work Station (precision lighting)
Reserve a 24 by 18 inch fold-down shelf at seated height with dedicated overhead light and a magnifying lamp. Anchor a small tray or mat to the surface edge to keep beads from rolling. Hang a shallow organizer from the underside of the folded table so it opens with the workspace. Add a tiny clamp or edge lip to stop tools sliding during fine work.
Multi-Purpose Craft Wall (rotate by project)
Design a 6 foot vertical band containing three modular panels: a peg panel for tools, a flip-out shelf for heavier work, and a shallow cabinet for finished pieces. Make each module 18 to 24 inches wide so you can use them alone or together. This lets you expand horizontally while keeping the rest of the studio free. Tip: place the heaviest module lowest to keep the center of gravity friendly.
Mobile Maker Layout (rolling cart + pop-up table)
If you move locations often, make the rolling cart the hub. Use a 24 by 18 inch pop-up tabletop that clips onto the cart when in use. When stowed, the cart slides into a narrow alcove or closet. This trades permanent wall work for rapid reconfiguration and lets you take projects outside on sunny days.
Quick checklist for picking a layout. 1) Match table height to your main activity. 2) Keep a 30 inch circulation path when folded. 3) Plan storage within a 3-foot reach of the work surface. 4) Aim for teardown time under five minutes so the studio stays livable.
Budget-Smart Builds and Ongoing Maintenance for Longevity
A compact craft zone doesn’t have to be expensive. Prioritize what unlocks the most function: a secure wall-mount table, a rolling cart, or a pegboard system gives the biggest return on a small budget. Use thrifted cabinets, reclaimed wood, and solid hardware to DIY durable pieces. Below I outline estimated costs, material swaps, and when to buy versus build. Little hacks like laminate shelving or IKEA parts keep costs down while staying sturdy.
Budgeting your build: realistic numbers and priorities
Break the project into must-haves and nice-to-haves. For a basic fold-down table plus simple wall storage plan on $75 to $200 in materials. A tabletop from plywood or a repurposed door can run $20 to $60 if you shop remnants. Heavy folding brackets or a good pair of hinges are $20 to $60. Lighting, small bins, and fasteners add another $30 to $80.
Prioritize safety and solidity: mounting hardware, brackets, and a plywood backer if you can’t hit studs. Buy spare bolts and anchors up front. Skip decorative finishes until the structure proves durable. Build in phases: secure a reliable work surface first, then add organizational bits and nicer finishes as your budget allows.
Keep costs down without sacrificing quality
Hunt for secondhand pieces to repurpose. An old cabinet door or a discarded tabletop becomes a foldaway surface with a little sanding and new hardware. Plan cuts on a full sheet of plywood to reduce waste. Trade or barter leftover supplies with fellow makers. Use clear plastic bins and tackle boxes you already own instead of specialized organizers.
When buying new, buy only what you need and match fasteners to your anchoring method. A decent drill or multi-tool is a better investment than a pile of cheap single-use tools. Design conservatively for load. Build for twice the expected weight and you’ll dodge premature replacements.
Maintenance routine that keeps everything working
A little attention saves big replacement costs. Monthly, visually check hinges and brackets, tighten loose bolts, and fold the table up and down listening for creaks. Lubricate metal hinges and sliding parts every three to six months with a light oil. Inspect caster wheels and replace worn ones before they seize.
Quarterly tasks: wipe down surfaces, dust storage bins, and relabel anything that migrated. Store textiles and papers in airtight containers with silica packs to control moisture. Rotate or flip cutting mats to spread wear and replace them when deep cuts compromise accuracy.
Annually do a load test: place a known weight on the open table and watch for sagging. If joints creep, add a reinforcing cleat or a thin plywood backer. Keep a small emergency kit of spare screws, anchors, and a replacement bracket so a quick repair gets you back to work.
Small maintenance habits and a sensible budget keep your foldaway craft zone reliable and stress free.
Final Thoughts
Turning a 100 sq ft studio into a foldaway craft zone is totally doable if you stick to the fundamentals: an honest needs audit, smart storage, sturdy foldaway mechanics, sensible layouts, and a maintenance plan that actually gets followed. Measure the room, mock up footprints with tape and cardboard, separate everyday tools from seasonal supplies, and plan storage by frequency and weight. Use pegboards, shallow bins, a hanging shelf under the table, and a rolling cart so tools are accessible but not permanent fixtures. Match hardware to load, anchor into studs or a plywood backer, and design for roughly twice the expected weight for peace of mind.
If you want one concrete recommendation to start, build a secure fold-down table as phase one. It gives you the most immediate functionality. Make the tabletop reversible for mixed projects, add a grommet for power, and use removable stabilizing legs or locking brackets for extra rigidity. Pair that with a slim rolling cart that fits under the folded table and a peg panel or shallow shelf above the work surface to corral daily essentials. Little details like a routed lip to stop jars from rolling or felt pads to cut clatter make daily use nicer.
What to do next. Spend 30 to 60 minutes this week on a needs audit and a quick mockup with tape and cardboard. Pick the layout that matches your main craft (sewing nook, paper station, jewelry bench, or mobile maker), list the materials you need, and set a realistic weekend timeline and budget. A basic fold-down and storage often lands in the $75 to $200 range. After installation, adopt a simple maintenance routine: monthly visual checks, quarterly cleaning and relabeling, and an annual load test so your setup stays safe and reliable. Tackle one zone at a time and keep the studio livable while you improve it.
Ready to try it? Post a photo of your blank wall or drop your room dimensions and main craft in the comments and I’ll suggest a focused next step. Prefer to work offline? Try a one-week challenge: mockup by midweek, source materials by Friday, and build the fold-down table over the weekend. Tiny steps lead to big wins in small spaces.
Related product reviews

Best Fold-Down Wall-Mounted Picnic Tables for Small Space Living
Compare fold-down wall tables that free floor space on balconies, in RVs, or at campsites. Find sturdy, quick-set options for eating, working, or relaxing.
Read more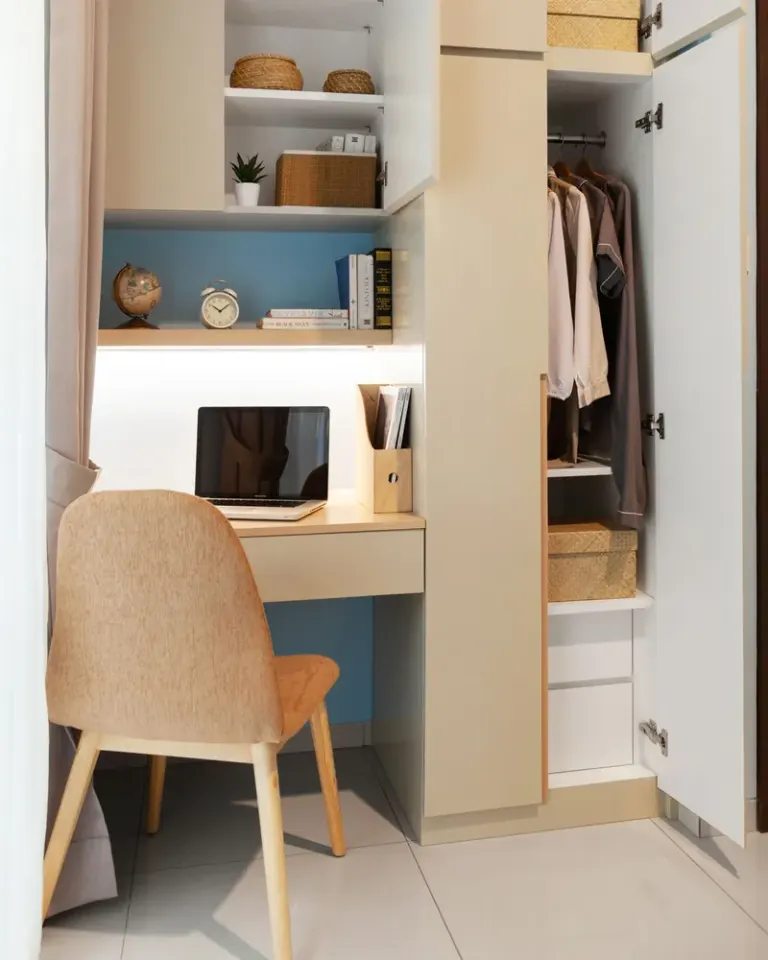
Best Fold-Away Closet Desks to Maximize Your Home
Discover bi-fold and fold-away closet desks that reclaim floor space, hide a home office in your home, with smart storage, cable management and easy setup.
Read more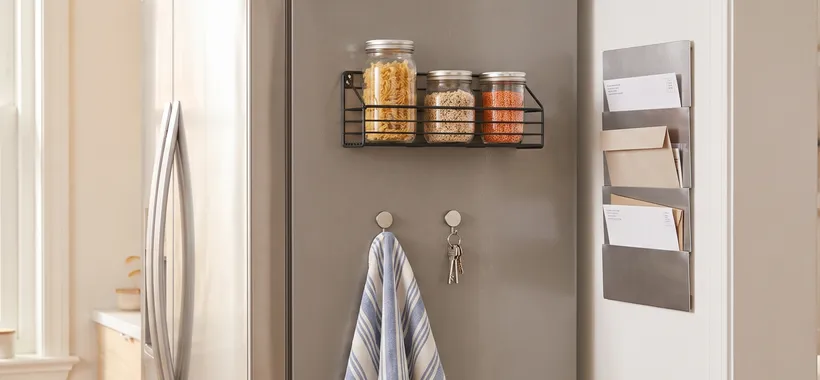
Best Magnetic Modular Storage for Small Space Living
Match magnetic shelves, file pockets, wall panels, and hooks to the metal surface you actually have. Five picks for kitchen, office, entryway, and hanging jobs, plus what a weight rating really holds and what to measure first.
Read more